Unitra M3015 tapedeck restoration, Part 1
Backstory
I inherited this cassette deck from my recently deceased father and since it holds great sentimental value to me I decided to do a full restoration on it. Now, despite this brand being derided online (on top of it being pretty unknown if you’re not from Europe) to me it sounds really good. I’m no audiophile but I care deeply about my gear and music. If it sounds good to me I’m happy and this deck sits firmly in the “sounds good” category to me. It’s not like I’m expecting miracles, we’re talking about an entry-level cassette deck here. Type 1, type 2, record, Dolby B and that’s pretty much it feature-wise. Another reason I like it so much actually, not to mention how much easier it is to do repairs on.
To preface, I don’t really know how much this deck has been used. My father bought it when he was really young, some 40ish years ago. It was part of a system which included other components - tuner, amplifier and speakers. My gut feeling says it wasn’t used that much for cassettes. I vividly remember using it as a kid, but probably not for too long. Maybe a few years at most - CDs arrived in the household quite early and ever since then all the cassettes were thrown away. I think the system was used mostly for the tuner. So, where was the deck hiding for more than 20 years then? Its habitat was very inhospitable and clearly not a place where one should store old electronics - it sat in the attic, where the temperatures during the summer easily reach over 40 degrees C. Not much better during the winter due to the proximity of the chimney there. In short, awful, awful conditions for a device. I was quite amazed that the thing was even there and not thrown away, but upon seeing it for the first time in more than 20 years I had very little hope of it being alive. I wanted to see what gives, considering I already have two decks so by this point I have some experience in dealing with them.
Initial condition
I didn’t take a picture of it when I got it out of the attic but suffice it to say it was the dirtiest thing I’ve ever seen. Wrapped in a bubble of cobweb, just under the layer of melted front panel paint, and sticky all over the place. Utterly disgusting. Just cleaning it took several days, enough to mess up my entire room.
Restoration
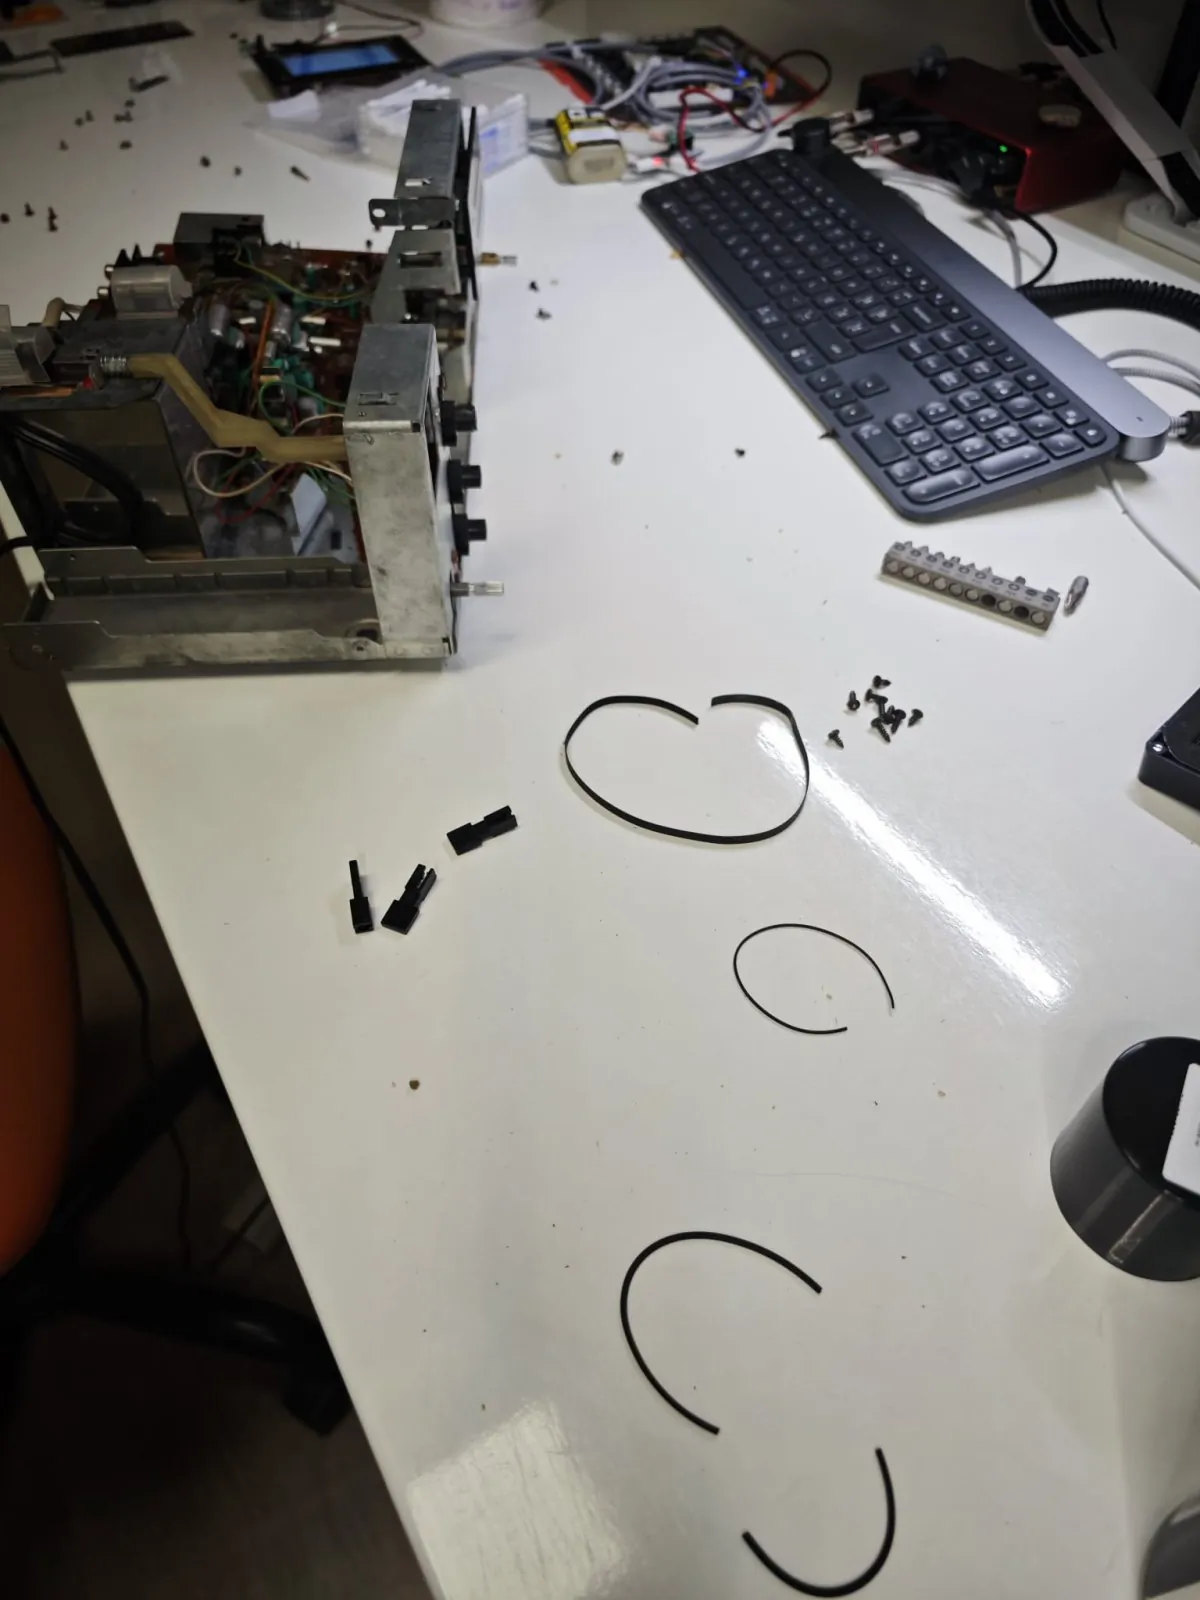
As expected, all three of the belts were broken. Surprisingly they didn’t turn into goo, so removing them wasn’t that difficult. Something I hadn’t realized at that point is that the entire transport is being driven by the kinetic energy coming from the capstan motor, due to the semi-soft-touch mechanism (which is interesting on its own I must say) so I wondered why the hell none of the functions work (record, play, pause etc.). At least the deck didn’t set itself on fire after the first power-on after 20 years. Nonetheless, I proceeded with cleaning up everything inside it, including the transport. I measured the belts, ordered new ones, and waited. Not much to do really in the meantime. Luckily they all fitted perfectly and naturally, transport buttons began to work. Whoa! Some progress here. I was very happy at that point. However I wasn’t very happy about the fact that the motor shaft wasn’t centered at all so it rattled all over the place. At first I thought it was bent or something, but no. The motor is encased in a metal case, and what held it centered inside was a piece of… something. I have no idea what it was, but it looked like broken clay. Ugh. Time to remove all that junk. But now I had a problem - what to insert between the two casings? Clearly something must hold the actual motor inside the case together. With no other solutions on hand, I filled the inside of it with… pillow filling. This worked very well - for a while, that is - although I did have to fill it very tightly. No more rattling! Shaft is spinning centered! Yeah, utterly ridiculous. Time to play a test tape.

The video below shows the result of playing the first tape. The pillow-filling-filled motor works. :) At this point nothing was calibrated at all, just played as is.
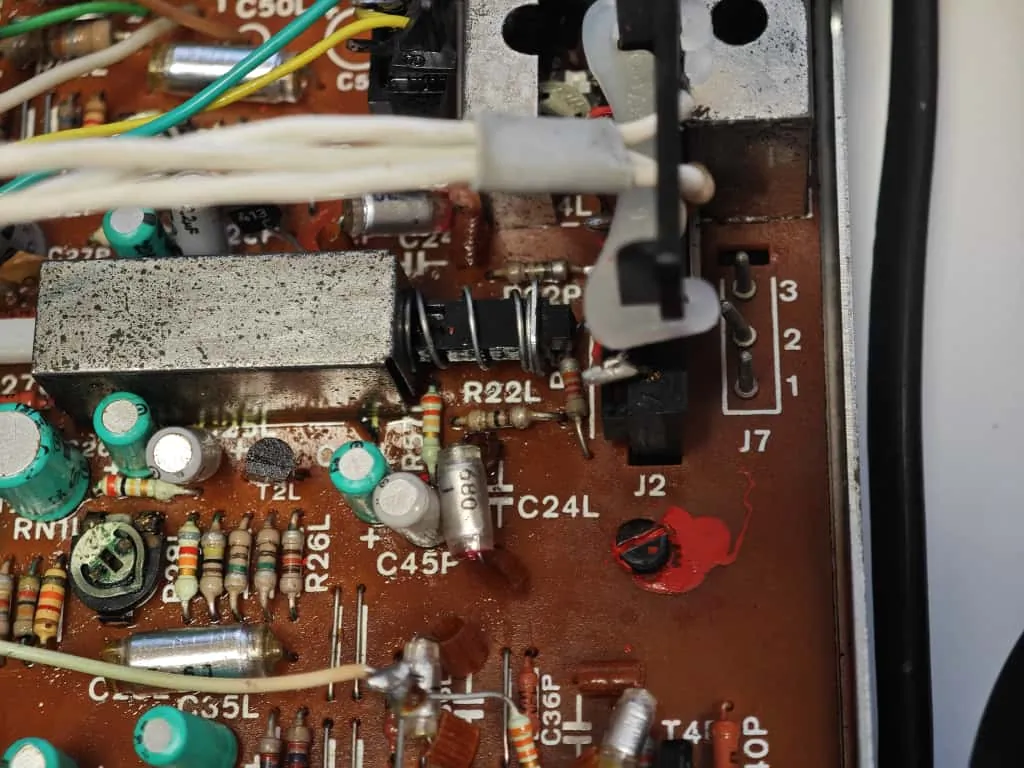
As I said earlier, this deck supports just type 1 and type 2 tapes, and the selection between the two is made with the Isostat switches on the front. The problem with those switches was that they just didn’t work at all. All the movement I could get from them was less than 1mm of travel and that was it. It turned out that I needed to press both of them very hard until whatever hardened inside them broke enough to allow them to travel. On its own this wasn’t enough to make them work - they are latching, and pressing one of them automatically disengages the other, but that didn’t happen - I could press both of them all the way, but neither of them latched and the disengagement of the other one didn’t happen. They both needed several cycles of Kontakt 60 / Kontakt WL until they finally started to behave again. After that I added a bit of Kontakt 61 and the switches were back in business.
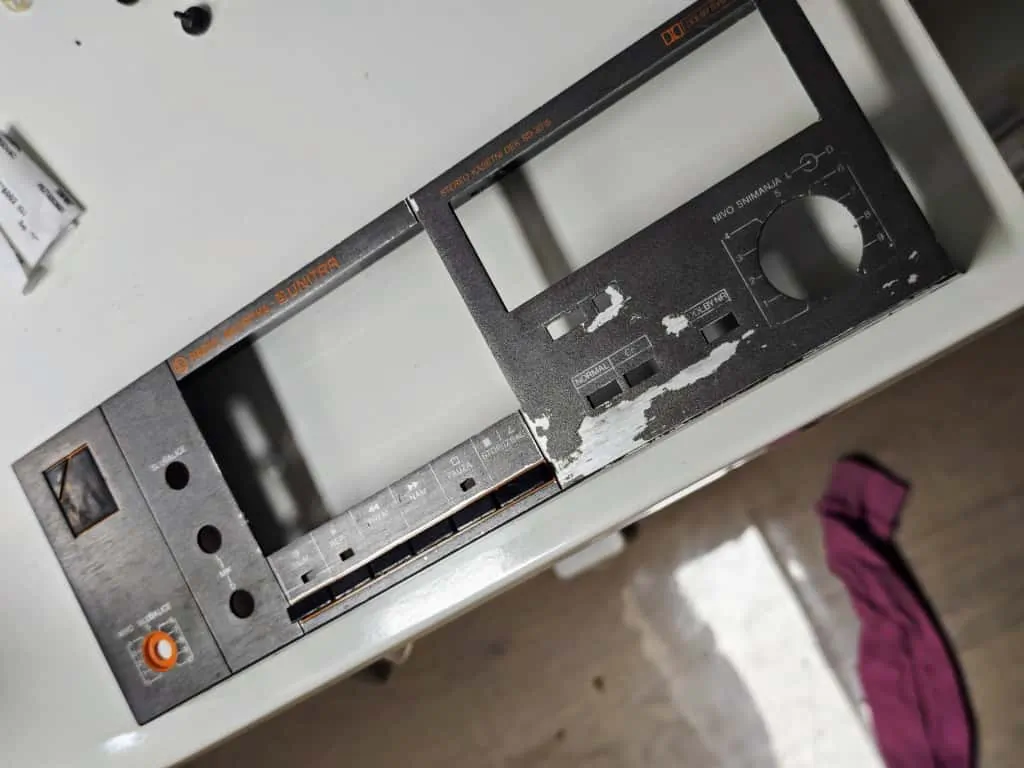
The next thing I wanted to tackle was the cassette door, and the door had two problems.
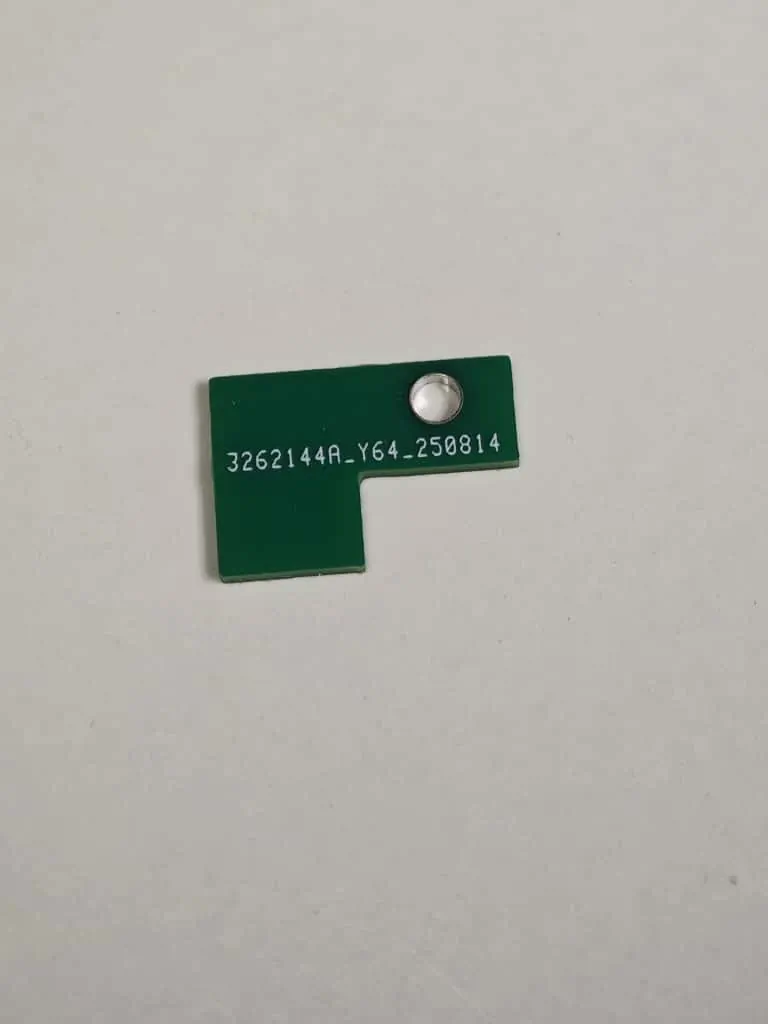
The first problem was that the door couldn’t be closed. Once pressed towards the deck, it would just swing back since there was nothing to hold it. Looking at the service manual revealed that there should be a small clutch of sorts on the right side of the door which then slips into the opening in the door plastic and holds the door. The clutch was missing. My hypothesis here is that someone, at some point, wanted to eject a cassette by force and just pulled the door outwards until it opened. Kinda makes sense considering the fact that the door cannot be opened unless the deck is 1) powered on and 2) the transport, and with it, the belts, function. So if the belts broke even back then already it makes the forced opening scenario plausible. I’ll never know for sure, but what I do know is that this is my problem now and it needs to get fixed.
Since I don’t have a 3D printer nor do I know how to make 3D drawings of parts I had to figure out something else. What I do know, however, is how to draw a PCB. So that’s what I did - drew a very small PCB in the shape of that clutch and sent it off to production. A few days later I had it on my desk. I forgot to order it in black however, so I just sprayed it instead. I superglued it to the place where the original part was. Fixed!
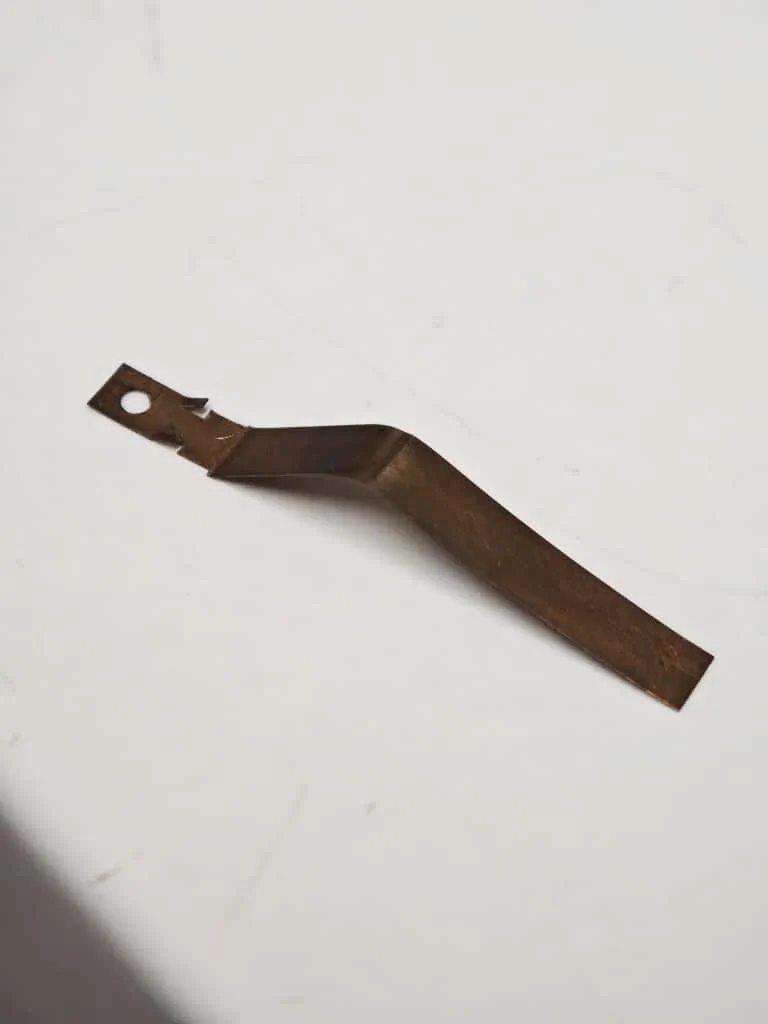
The next problem with the door was the lack of a small metal “bumper” of sorts which holds the cassette firmly inside the door so that it doesn’t wobble. There should be two of them - one on each side, but there was only one on the right side, with broken traces of the other one on the left side. Due to this the cassette did wobble a bit in the door.
At first I tried to solve this with a thin aluminum strip but in the end it was a bit too thin to stay flexible like the original part, so it was time for another unconventional fix. I found hair pins which fit the door perfectly, and not only that, they hold the cassette more firmly and more stably than the original part ever could. I did spend a bit too much time in the cosmetics part of the store to find this, however.
Next up - recording.
I think every single thing in this deck having something to do with the recording was broken in one way or another:
- Record LED didn’t work
- Record level potentiometer didn’t work
- There was a noise present in one of the channels
- Recording couldn’t be activated at all actually without some help (more on this later)
So, let’s start with the easy things first.
- This was just a broken LED luckily. I ordered a new set of green and red LEDs for this deck, replaced the record LED and it worked.
- The reason the potentiometer didn’t work was because the solder on its pins broke. Resoldering the pins fixed the problem.
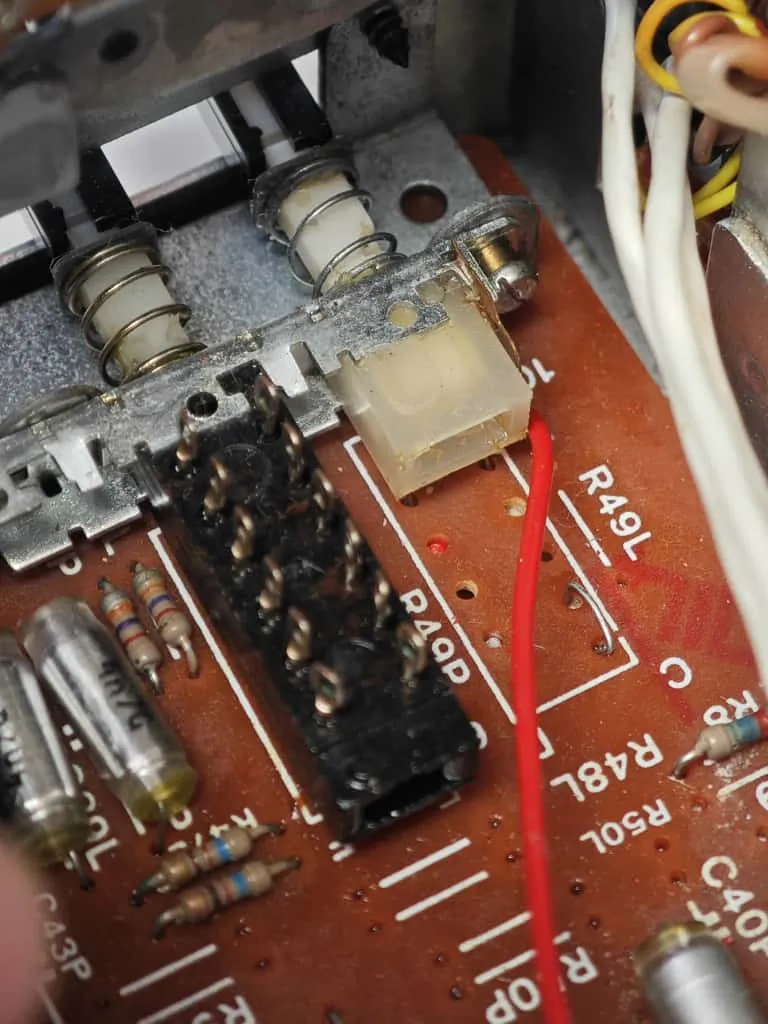
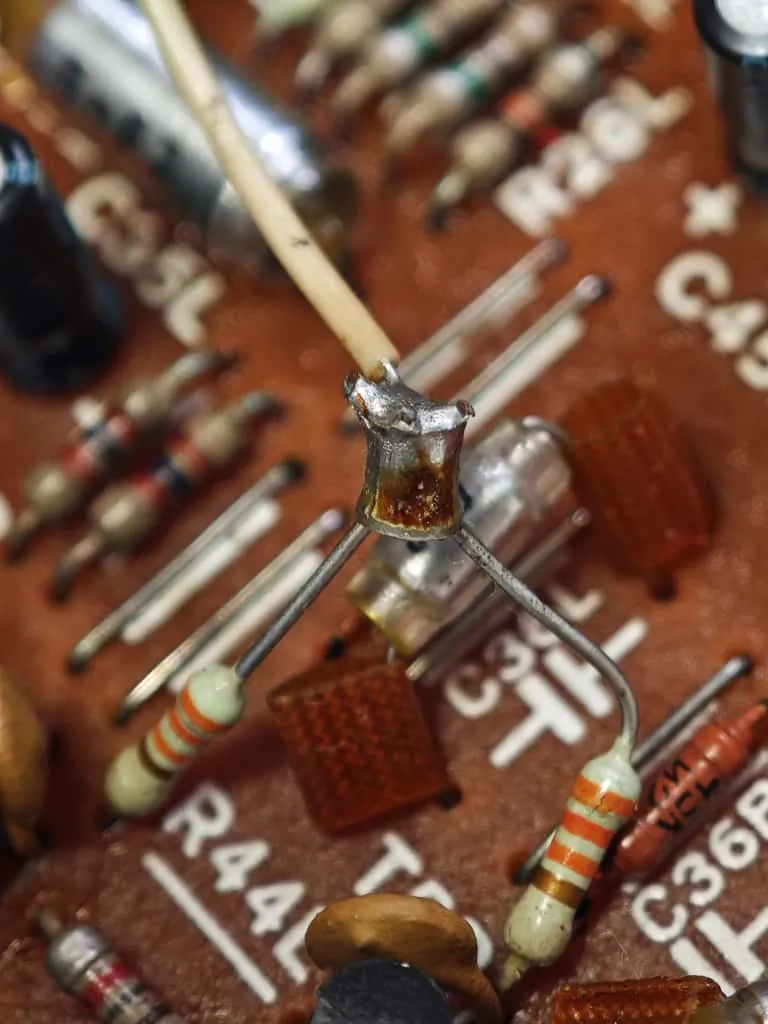
- Ah. This took quite some time to figure out. My first suspect was the electrolytic capacitor somewhere. But which one? To be honest, I didn’t want to investigate this. The fact that this deck is more than 40 years old and that it has spent roughly half of its life so far under extreme conditions really meant that I should just replace all the electrolytics inside. This took some time, but there isn’t a single original electrolytic left anymore in this deck - they’re all new. Unfortunately, this didn’t fix the problem. On the upside I did notice that the hum which the deck produced while it was idle was gone. So at least some good news. My next suspicion was that one of the transistors was damaged. Again, I didn’t know which one, but then something caught my attention. It took me a while to figure out that this was a hack job by someone, and that I’m clearly not the first to open up this deck. In short, someone wanted to bypass one of the transistors in the record circuit (BC136), but instead of just replacing it, they left it in place and did… whatever the hell this was. A bit of back and forth through the schematic and I figured where the now flying resistors need to be, removed the added transistor (which by the way had no markings whatsoever) and replaced the BC136. And what do you know, the recording noise was gone! This got me thinking - if one of the transistors got damaged even back then, could there also be some more damage to other ones? I kept going back to the thought of the conditions this deck has been under all these years so that made it easier to justify the decision to replace every single transistor in the deck as well. There was also the fact that someone mentioned the following in this thread on Tapeheads:
These typically decks suffer from degraded electrolytic Elwa capacitors and even some transistors in the audio path
Was this necessary? Probably not, but better safe than sorry.
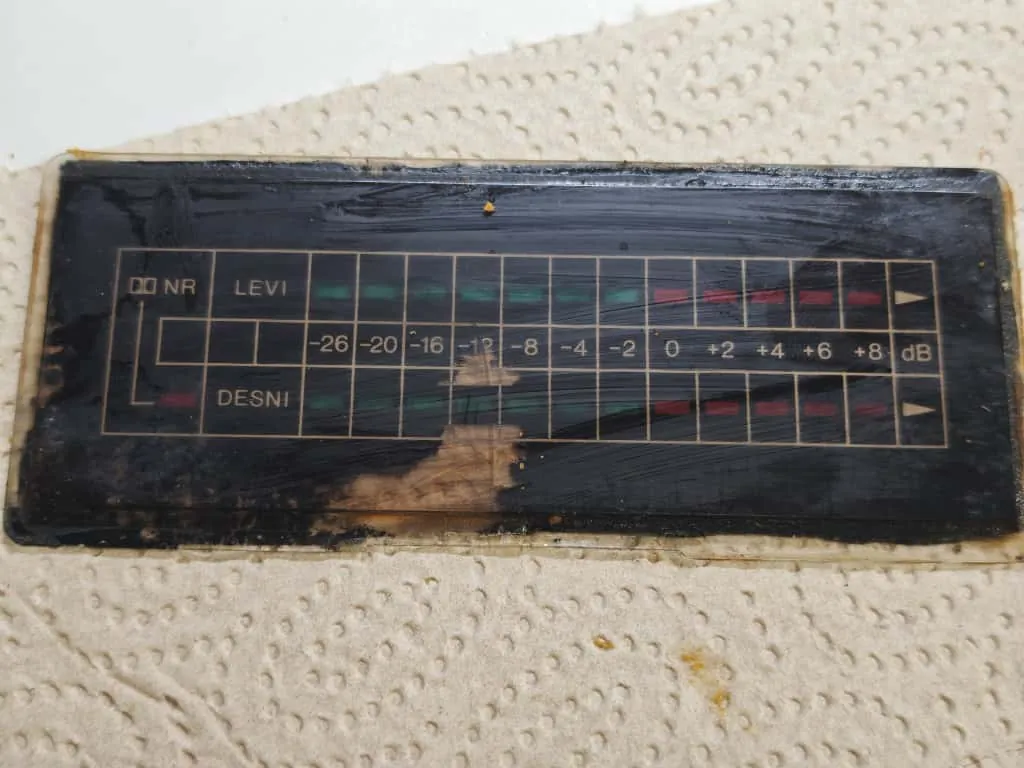
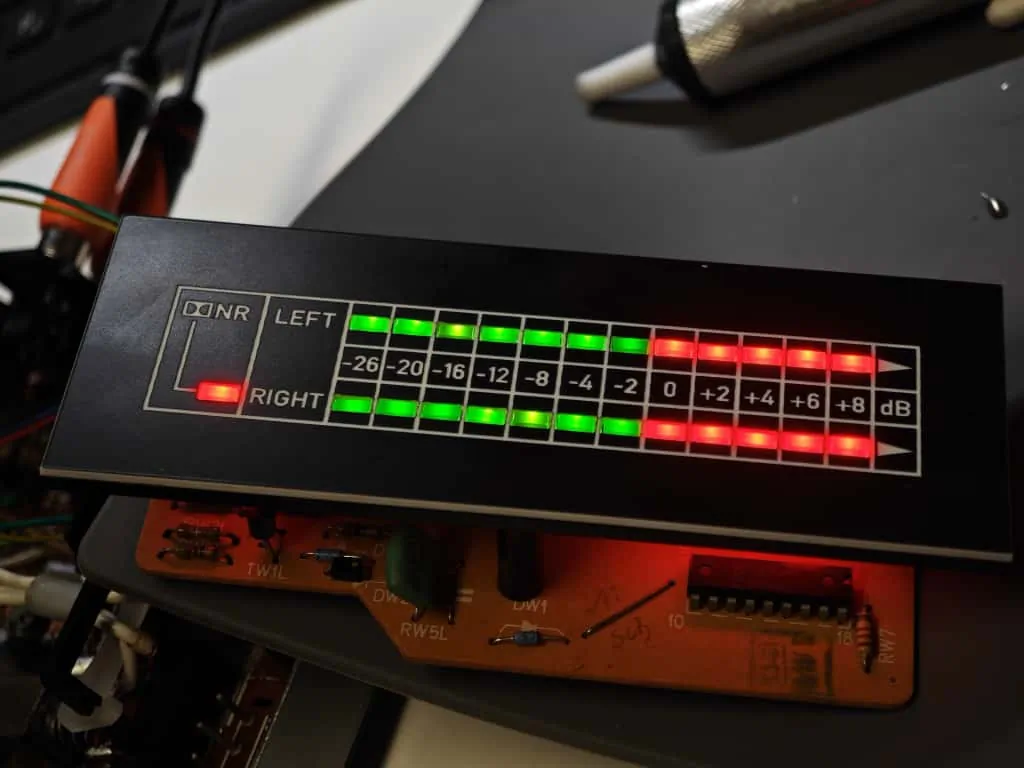
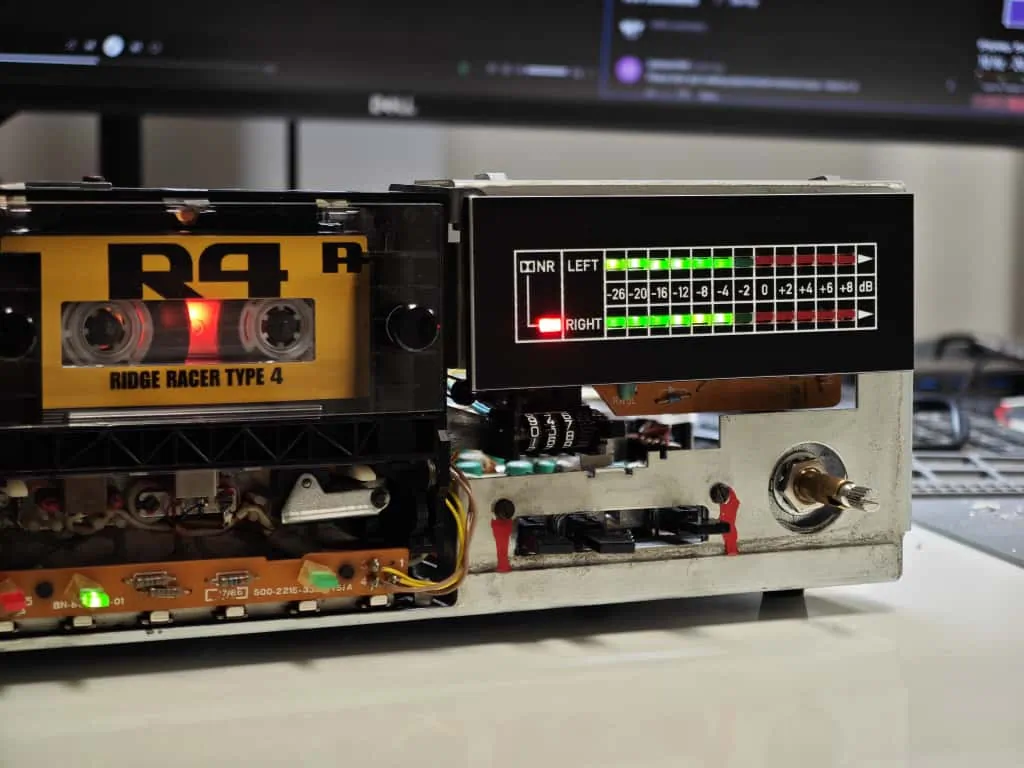
Before I get on the last recording problem (activation of it is hit-or-miss), let’s talk about the VU meter. Above I’ve attached a picture of the horrible-looking plastic cover for the meter which has labels printed on the back side which was then painted with something which has semi-melted in the meantime. Another thing I wanted to replace. I measured all the holes for the LEDs in the VU meter and drew a new design for the meter which was laser cut and engraved on a material called Gravoply. I glued it on top of the base VU meter plastic so it looks gorgeous now. :) The trouble I had here was that since the new plastic part was 1.5mm in height, all the LEDs were recessed, and simply raising them wasn’t really possible since the rest of their leads are cut, naturally. I ended up replacing all the LEDs in the VU meter just so that I could level them with the new plastic. Very annoying, but I like the result! Keep in mind that there’s still a clear and thin plexiglas part which will come on top of it later. The original VU meter window has been thrown away.
So for the final recording problem, the embedded video below shows what’s happening.
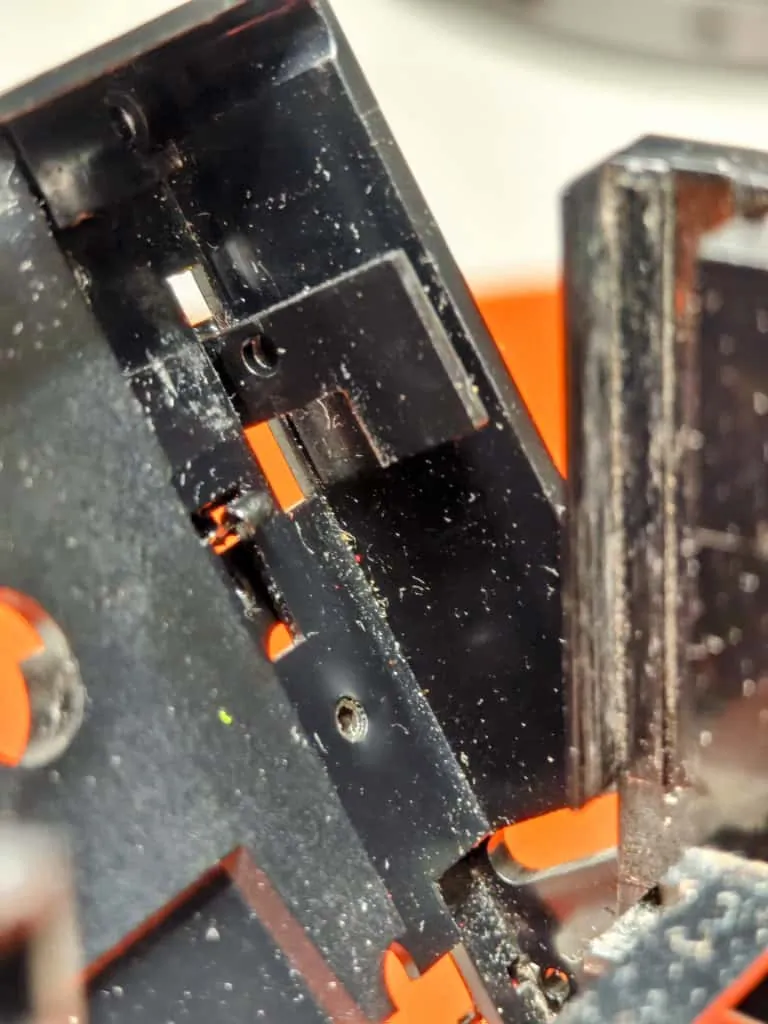
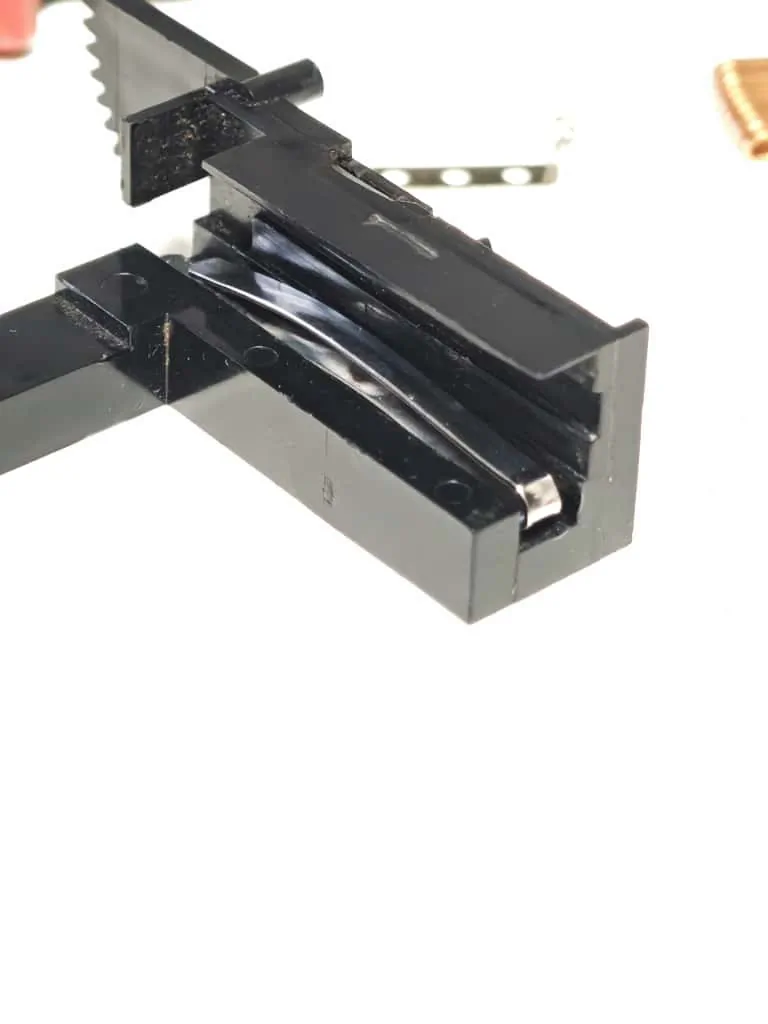
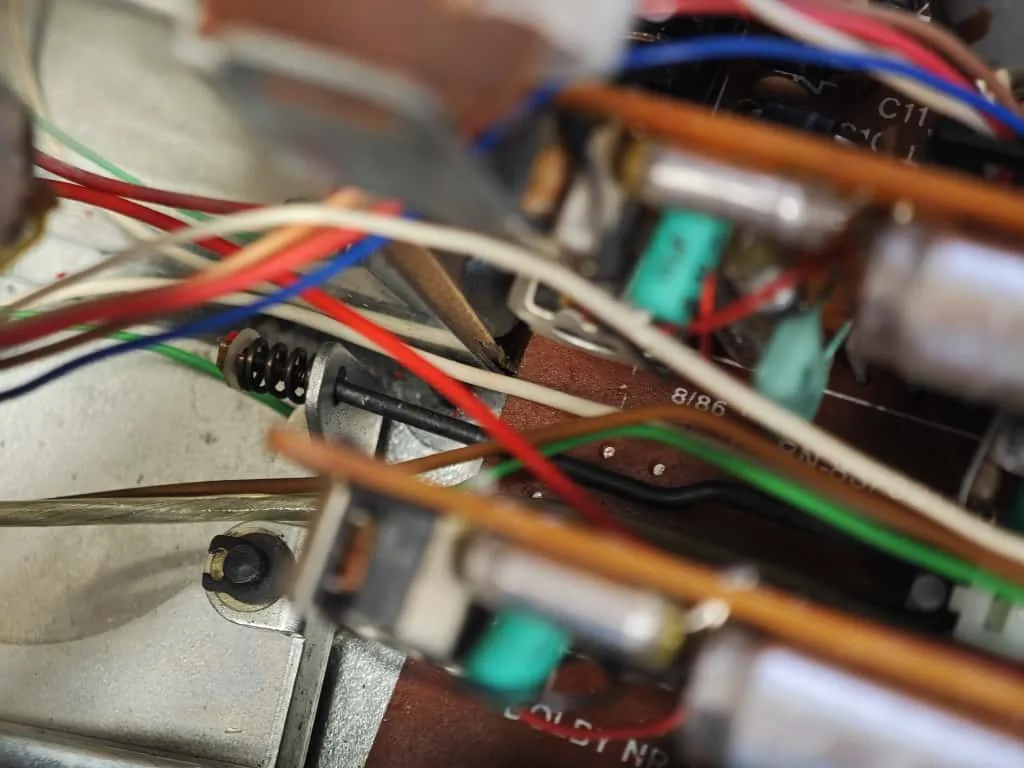
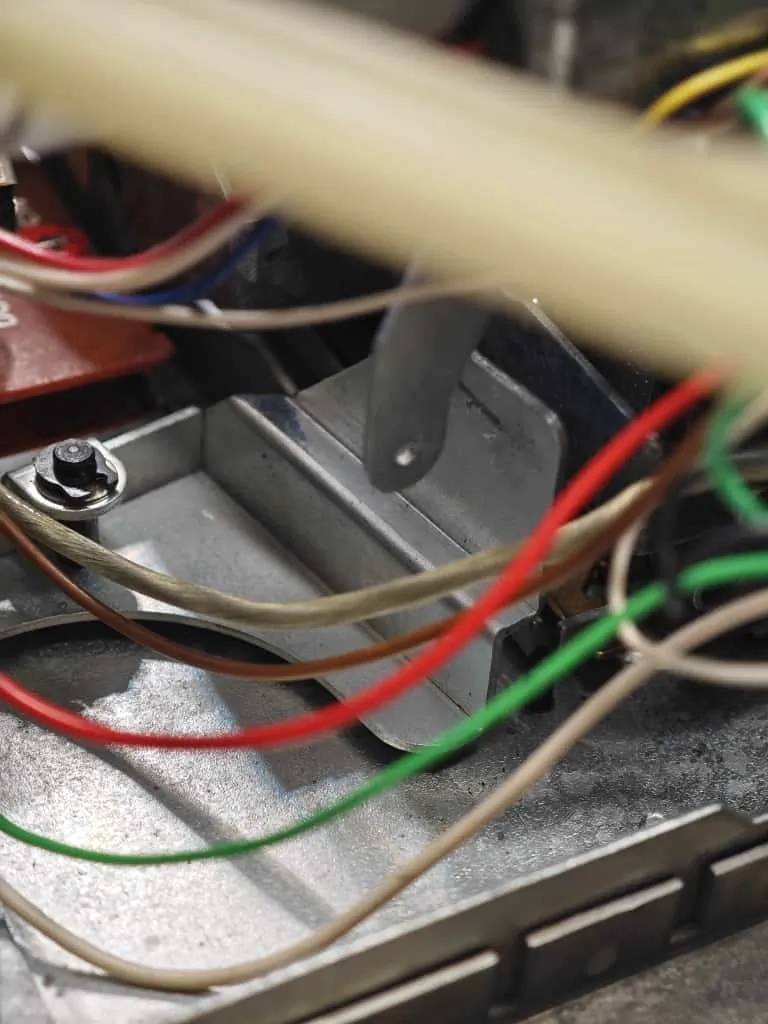
Inside the deck, there is a very long Isostat switch hooked to a lever which in turn is connected to a moving metal part through a screw which can be adjusted. Pressing record on the transport results in a “paw” (for lack of a better word) pulling the metal part inwards which in turn pulls the lever connected to the switch which then finally results in rewiring of signals from playback to record mode.
Quite ingenious really, except I just for the life of me can’t get it to work properly. The possible scenarios right now are:
- The adjustment screw is adjusted properly so that pulling of the lever results in all the contacts on the switch being fully switched but now the mechanism just “gives up” due to the higher force required to move it. I “bypass” this by manually pulling the metal part towards the transport after which I press record and the recording works fine. Note that the mechanism has no problem holding the lever firmly in place during the recording - the issue is pulling in towards the transport.
- The adjustment screw is loosened up - now the “paw” gets pulled properly most of the time (still not always) but now one of the channels doesn’t record properly since the switch isn’t fully switched. Ugh!
I really, really don’t like that switch at all, so I decided to get rid of it completely and replace the entire thing with a custom solution, but more on that in the next post.