I didn’t really need this, but I didn’t have a good enough answer to the question “Why not?” so here we are.
Backstory
Some time ago I was looking at getting a CD player for my work room, as I already had a turntable and a tape deck, so a CD player was the missing piece of the puzzle. Every time I looked around at what was available I came back disappointed - most of the CD players are dull black or grey rectangular boxes of sadness, and the ones blessed with a modicum of attention to the design cost stupid amounts of money. So, while I care about functionality, aesthetics are also very important to me. Sometimes even more so, like in this case for example, because, let’s be real - there are really no good reasons to deal with CDs nowadays. They are just pieces of plastic with digital data stamped on them, so I might just as well rip them and listen on my PC. But where’s the fun in that? Files are virtual and CDs very much are not. While maybe not as nice as vinyl as physical objects, I grew up with them so they carry that nostalgic vibe I wanted to have nearby. Personally, they remind me both of my childhood and the techno-optimism that was prevalent in the early ’00s. They also remind me of the times I played games on PSone. Games on CDs, music on CDs, tons of backup data CDs… CDs were everywhere in the household at a certain point and then they just vanished.
As for the PSone, I basically all but forgot about the fact that the console could even be used as a CD player until I saw some posts on the Internet of people using it purely as a high-end CD player. I really don’t care about the “audiophile” experience here. Just try searching for “ps1 cd player” and you’ll find a bunch of people claiming how Sony used some high-grade DAC inside PS1, but only on very specific models, and those are some sort of audiophile holy grails or whatever. Personally I think most audiophile people are insane. I just wanted something cool, man, and what would be cooler than listening to CDs on a PSone with the visualisations turned on? Doesn’t get more Y2K than that.
Inspection
So, first order of business was even figuring out whether my old PSone still existed, and if it did, whether it even worked all those years later. Good news on both fronts: yes, I found it, and yes, it kind of worked. It’s very naive to expect something to just work straight after being unused for roughly 20 years, especially so if the thing has any sort of mechanical parts. Luckily my console had only a few minor problems.
Power supply, initial idea
One of the things I hadn’t found was the original power supply. PSone needs 7.5V, which is somewhat non-standard. I went real deep into the rabbit hole with this. Instead of checking my local electronics store which actually has a readily available 7.5V power adapter, no, I decided to rip out the entire console first and use a USB C trigger board for the power supply. Those are really nifty boards which make use of the fact that USB C power is negotiable and the device can request various voltages, such as 5V, 9V, 12V, 15V and 20V. Some boards have an on-board button which can be used to switch between voltages while some have solder pads, but the idea is the same. None of the mentioned voltages are really 7.5V, so I needed another board to use as a step-down regulator to bring the voltage down to 7.5V. The steps were:
- Desolder the power connector from the console
- Sand off the power connector hole a bit so that the trigger board fits there
- Glue the board so it stays firm
- Set the board to 12V and power the step-down regulator with it, after finding the ideal position in the console for that one
- Bring the output from the step-down regulator back to the console

Power button
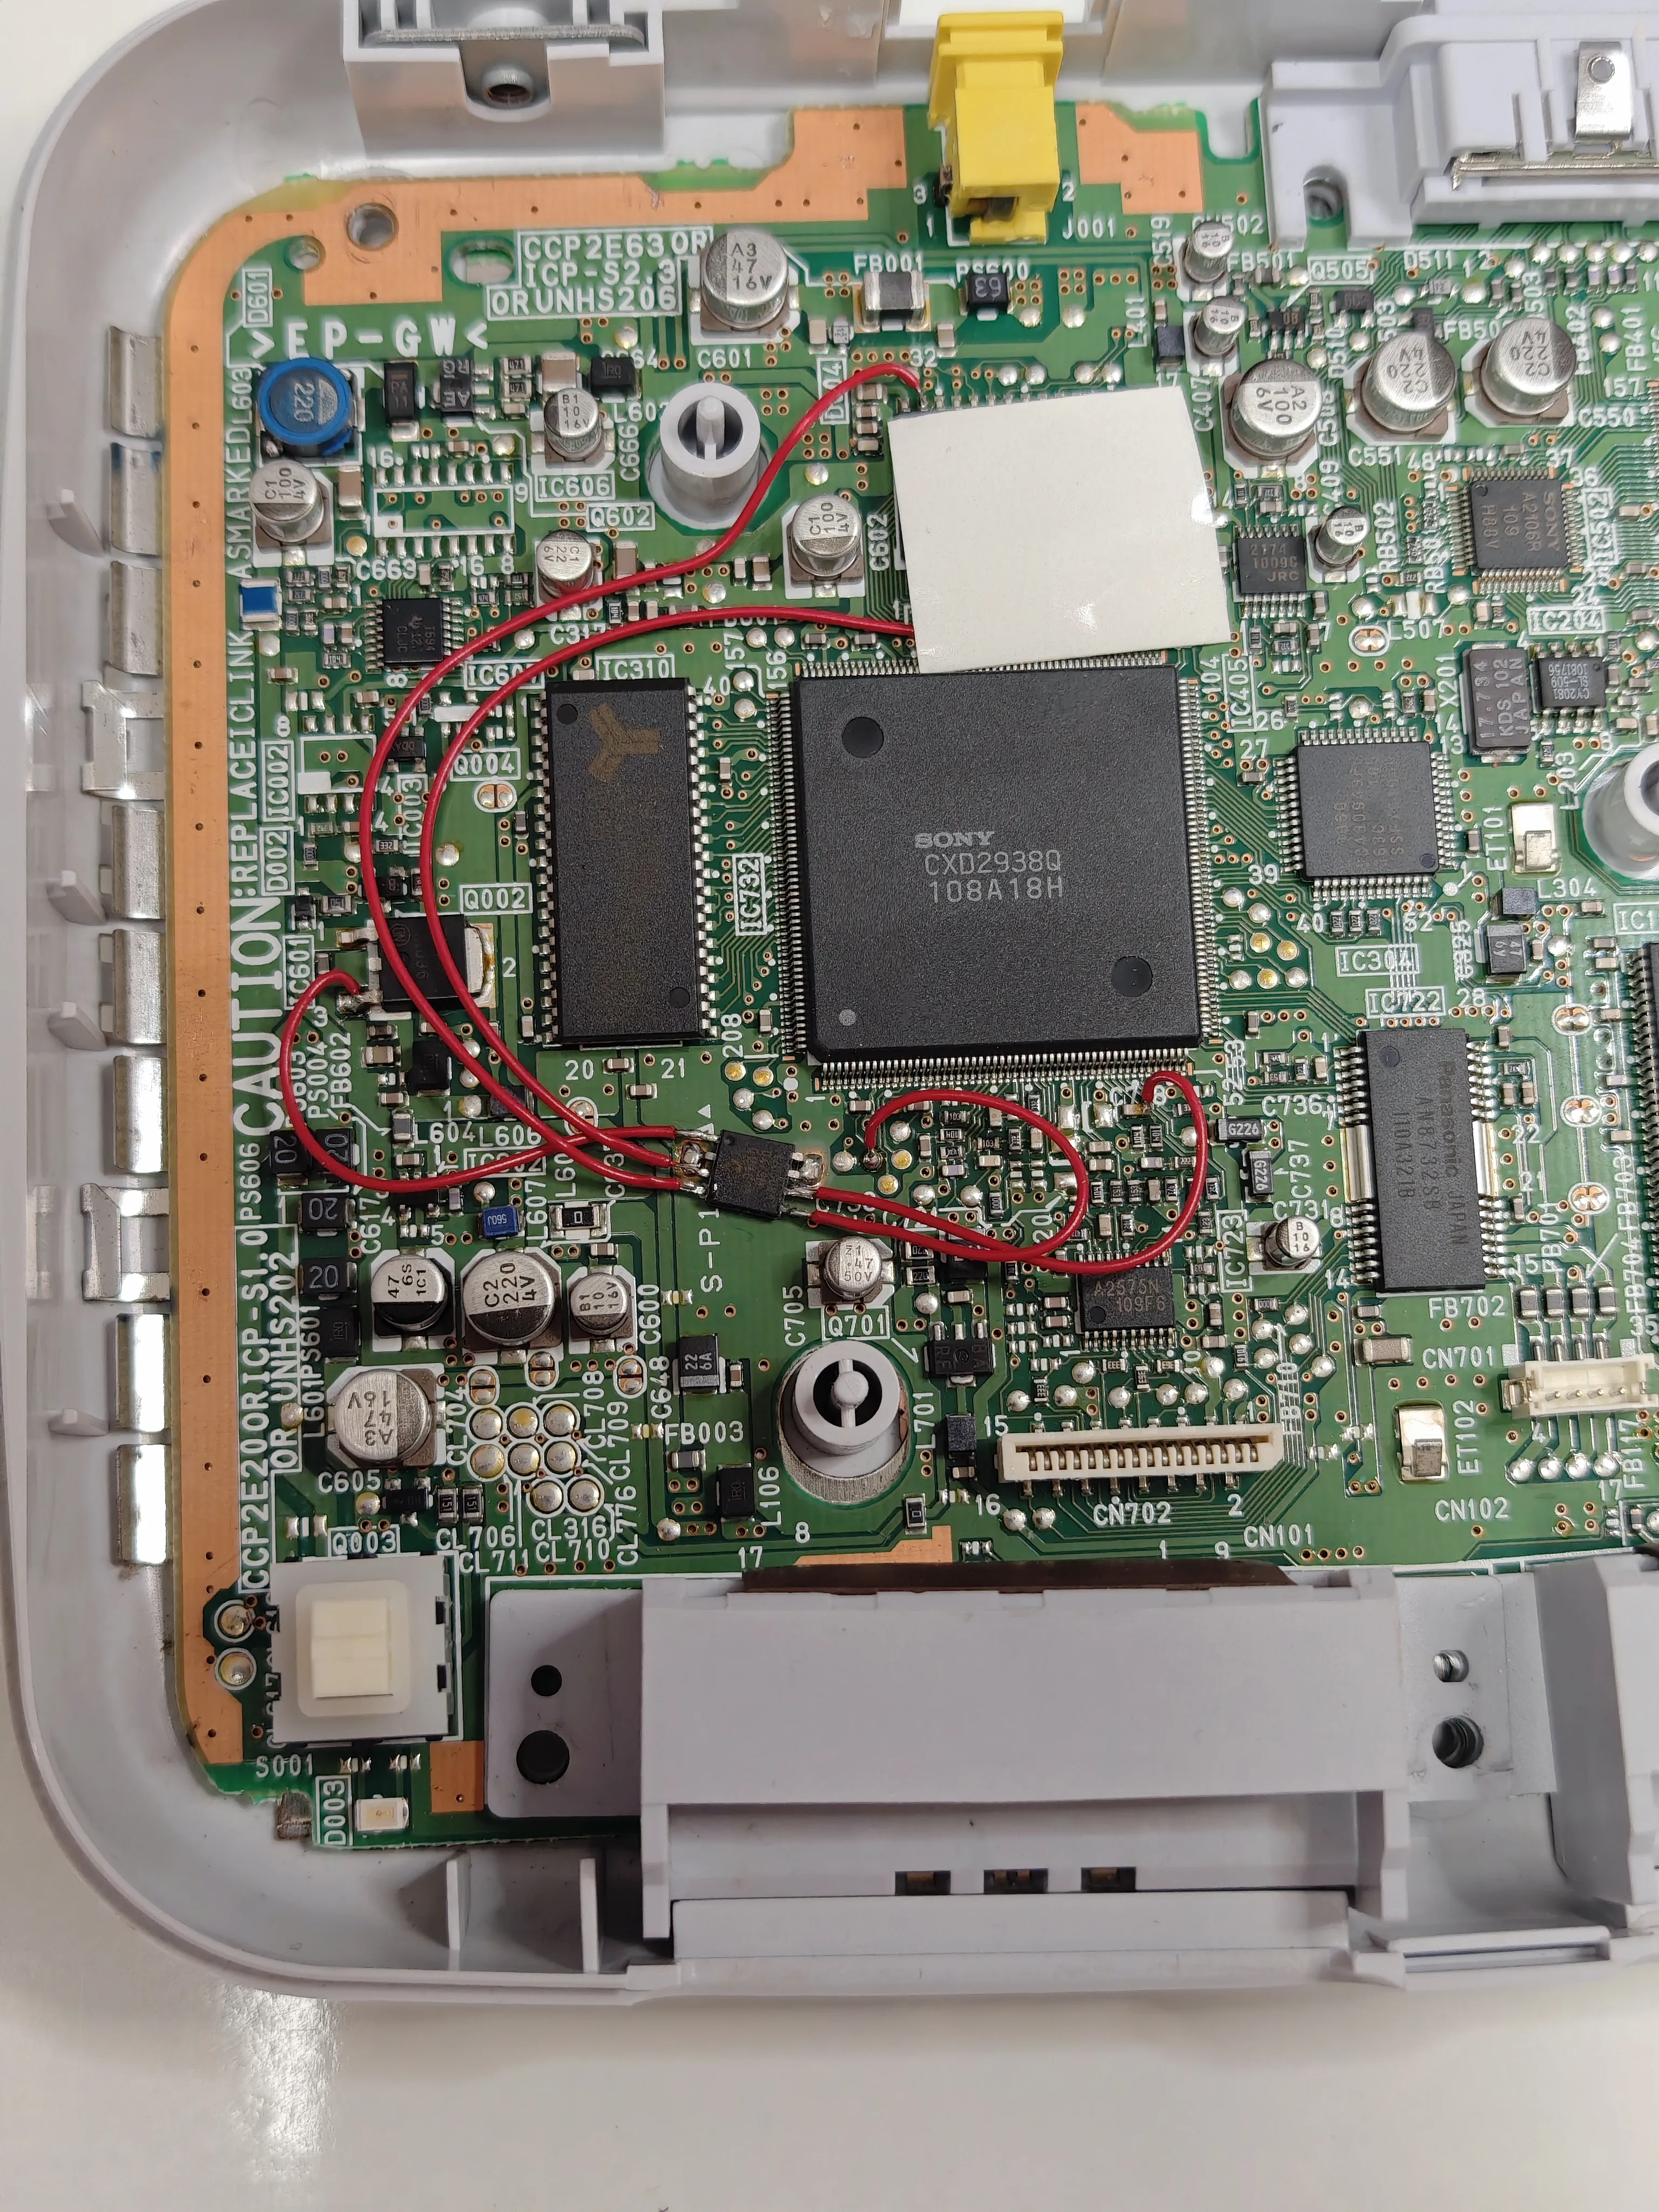
When I tried to power the console for the first time, it worked for a split second before it turned itself off. This gave me a scare, believing I fried something with the power supply mod. A few retries later and I’d figured out the cause - the power button. The console remained on only if I held the button pressed the whole time. Releasing it would turn the console off, so the button didn’t latch at all. Fortunately this was relatively easy to fix and it turned out that this is a common problem for those switches. After following the instructions in this video , the button started behaving again. The parts inside the switch are very tiny so it took some time to reposition them properly. Hearing that startup PSone sound again had me drenched in nostalgia.
Power supply, backtracking
I had severe issues with noise not just in the audio chain, but in video output as well, and I didn’t immediately recognize what the real issue was. Audio had very noticeable buzzing, and the display would sometimes flicker until I powered off everything. This also made me go on a side quest to buy a fairly expensive OSSC converter to get HDMI output, believing that the composite output was just crap. Even with all that I still got some flicker here and there. Until I figured, hey, what if that USB C trigger board is just very noisy? So I went to the store to buy the 7.5V adapter, which is what I ought to have done in the first place, and what do you know - audio buzzing gone, video stable. Holy shit. So much wasted time and effort for nothing. I’ve removed the trigger board (not the easiest thing to do after stupidly gluing it down) and the step-down, returned the original connector and everything worked properly. I will investigate how to make those USB C trigger boards quieter sometime in the future.
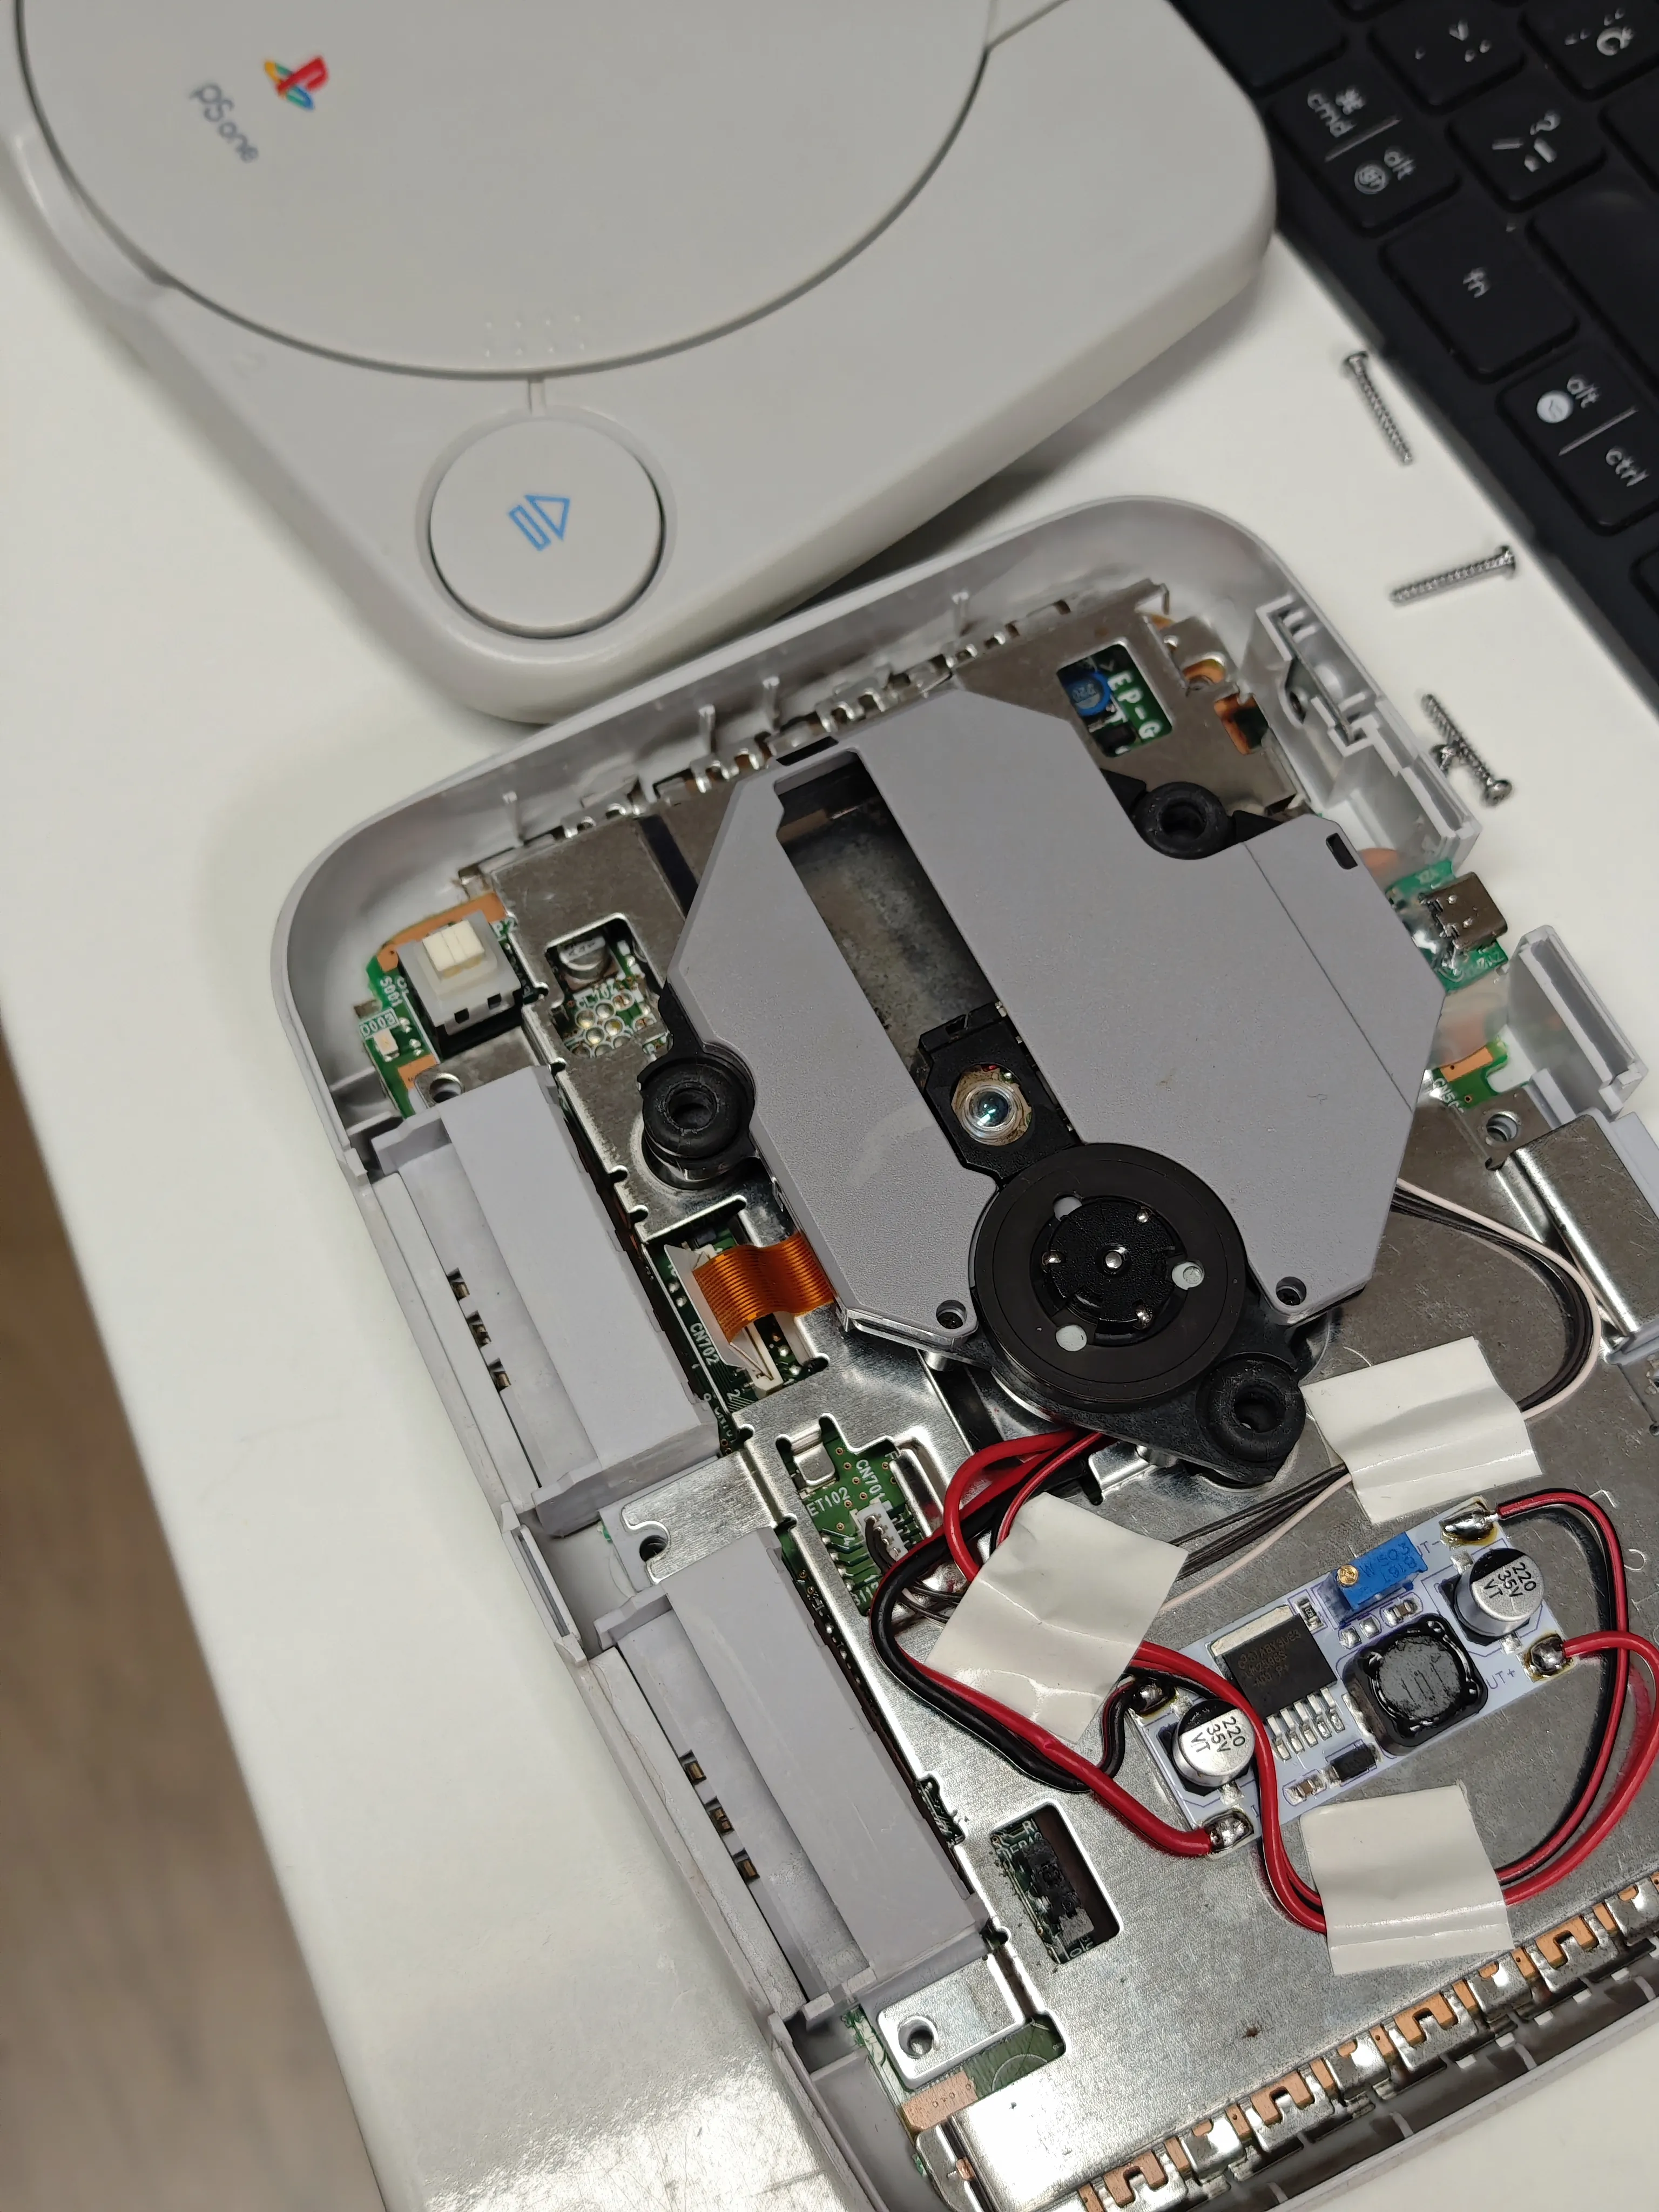
Mechanism
While the CD transport worked, it was somewhat loud, and certain audio CDs (which were in pristine condition) I put in it skipped randomly. Some checkups were in order. Sure enough, the grease on the mechanism had completely dried up. I took everything apart, cleaned the entire mechanism with isopropyl alcohol and relubed it with silicone grease. While I was at it, I also relubed the two motors. Voila! The mechanism is clean and there’s no more skipping. This video is the guide I’ve followed.
Mod chip
This was a modded console, meaning it could play burned discs. It turned out that it caused some usability issues here. If I inserted an audio CD into the console and turned it on, the boot screen would be stuck for a few seconds, waiting on something. My guess is that this is the point where the modchip injects the data the PSone needs to declare the disc genuine in order to proceed with the loading. Except this was no game disc, so the console was probably getting mixed signals: modchip saying this is a genuine disc, and the disc wasn’t a game, so there was nothing to load. After a few seconds of this the console gives up and presents the memory card / CD player screen. Another thing is that if I did nothing on this screen, every few seconds the console would try to spin up the disc again to try to load the game, after which the disc would spin down. Really annoying. Only after selecting the CD player screen could the CD actually be played. Since I was fairly confident that it was the modchip that was causing this and I had no intention of playing games on this console, I removed the chip. And what do you know, now when I insert an audio CD and turn the console on, it jumps straight to the audio CD player interface! No weird spin-ups and no waiting. Issue solved.
PSone mod chip
Controller
While I also found the original controller which I used back in the day, it was badly beaten up. Scratches everywhere, the white color turned yellowish, analog sticks were all crusty and almost none of the buttons worked properly. Barely worth salvaging, especially since the new PS5 controller looks so good! I’m such a sucker for that design. The only problem is: it’s wireless! How can I connect it to my PSone? Luckily there are actually several options available to solve that problem. Some clever people made an adapter which you plug into the controller port on the PSone and you can then pair a PS5 controller to it. The adapter then translates the presses into signals the console understands. Awesome! I bought a Wingman Brooks adapter for this purpose. It’s worth mentioning that the adapter supports a bunch of other features and controllers, both USB and Bluetooth ones. But I really only cared about the PS5 one. What a lovely thing.
Display
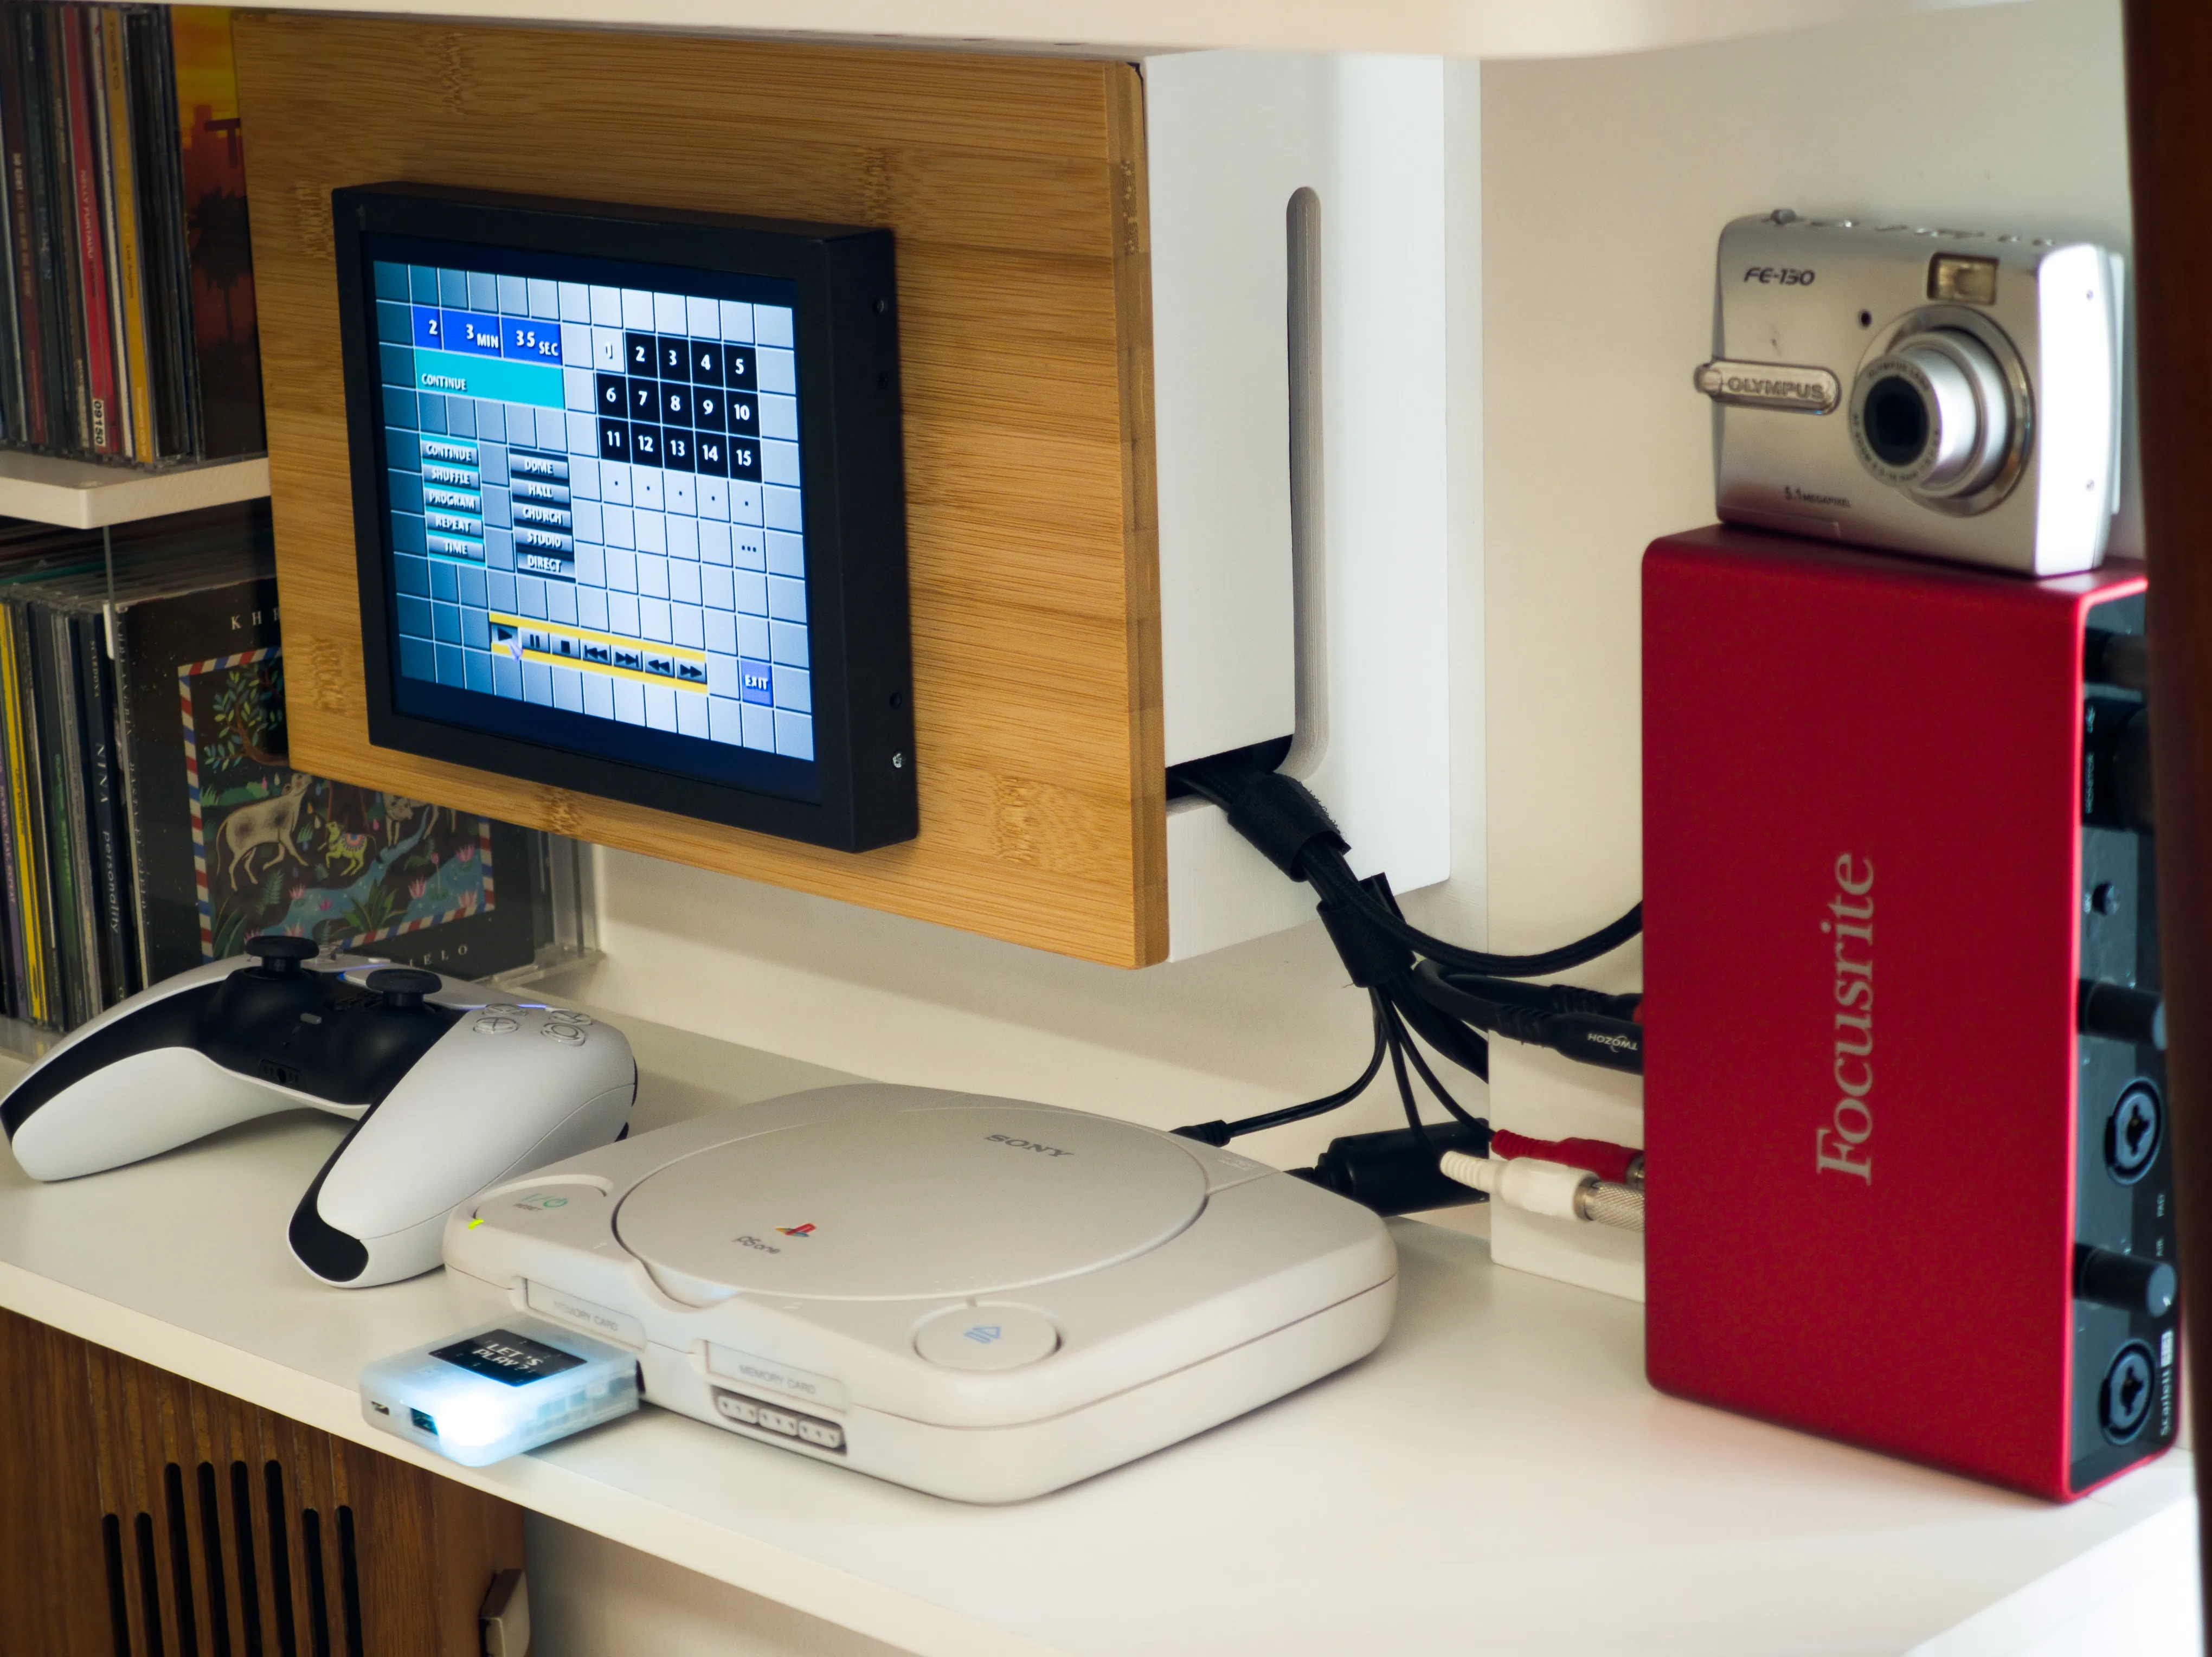
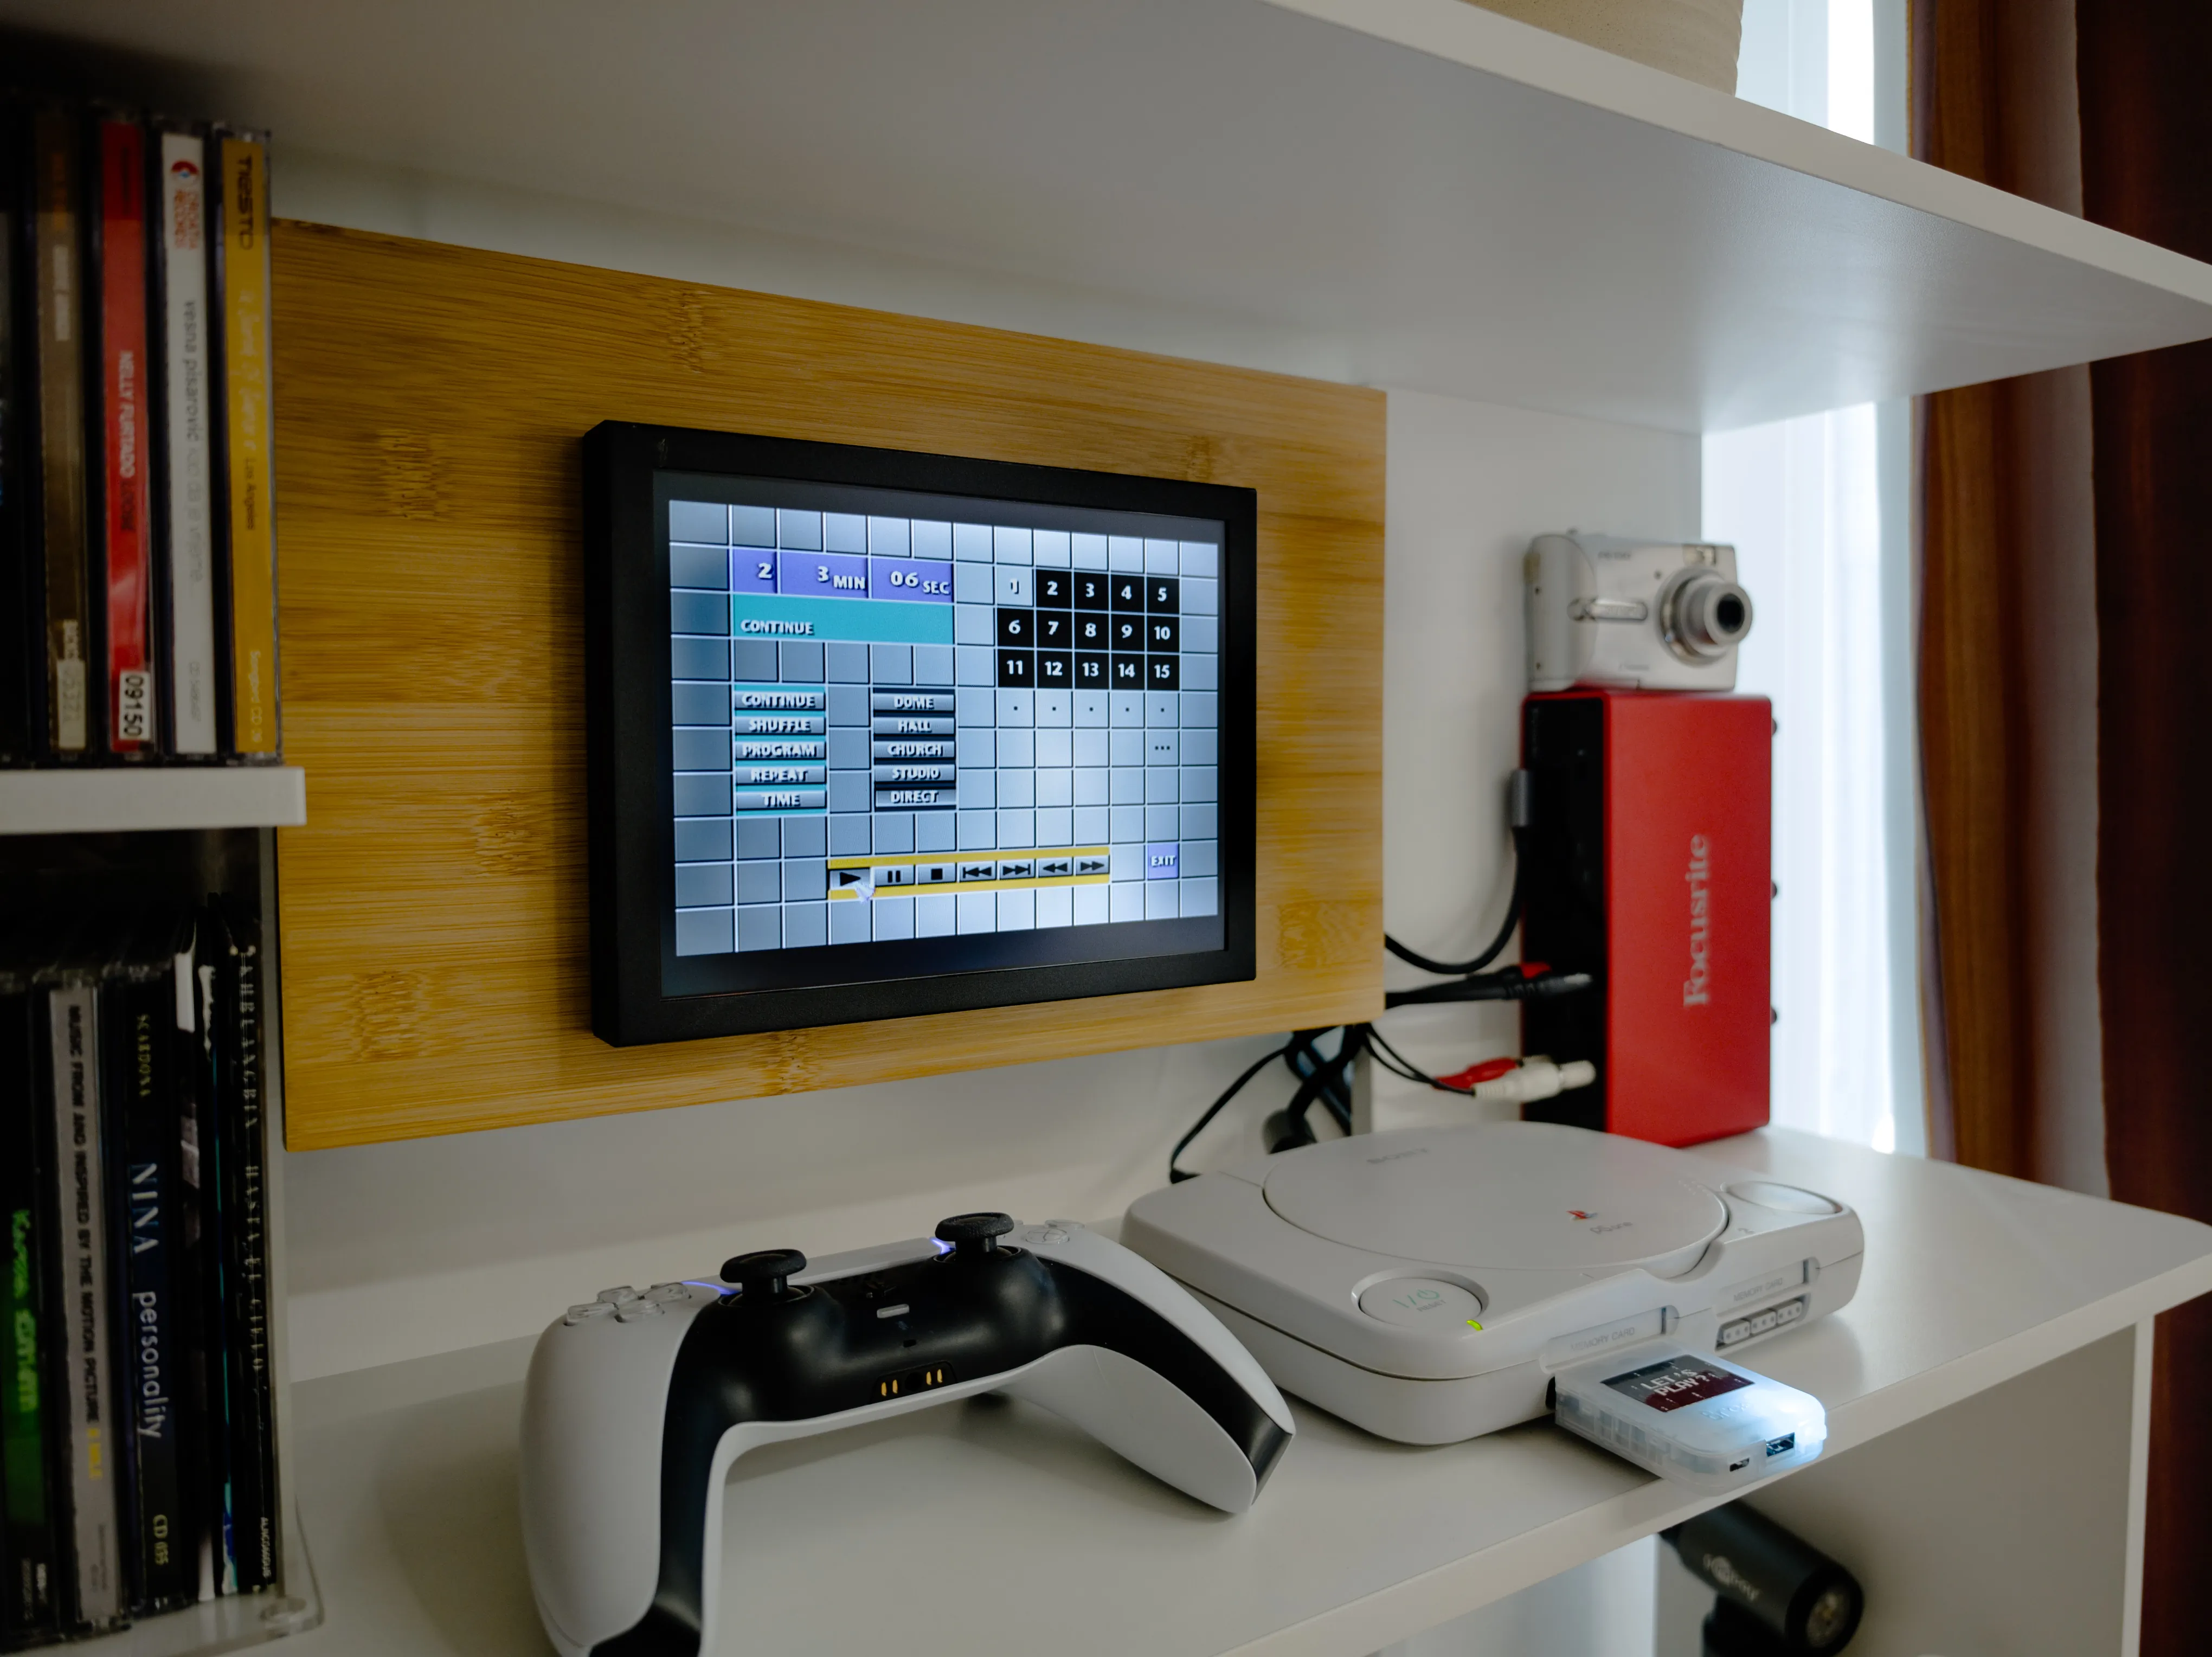
Naturally I needed a display of sorts to hook up the console. I settled on an Eyoyo 8" display which I got on eBay. I liked the fact that it 1) had S-video input, 2) had no ugly branding (or anything else for that matter) on the front panel and 3) had the connectors on the back laid out horizontally which allowed me to mount it flush in a box. Composite output is not the best PSone can do, but in my case it truly didn’t matter. I knew from the start I wanted a relatively small display which would only ever display the CD interface and the visualiser.
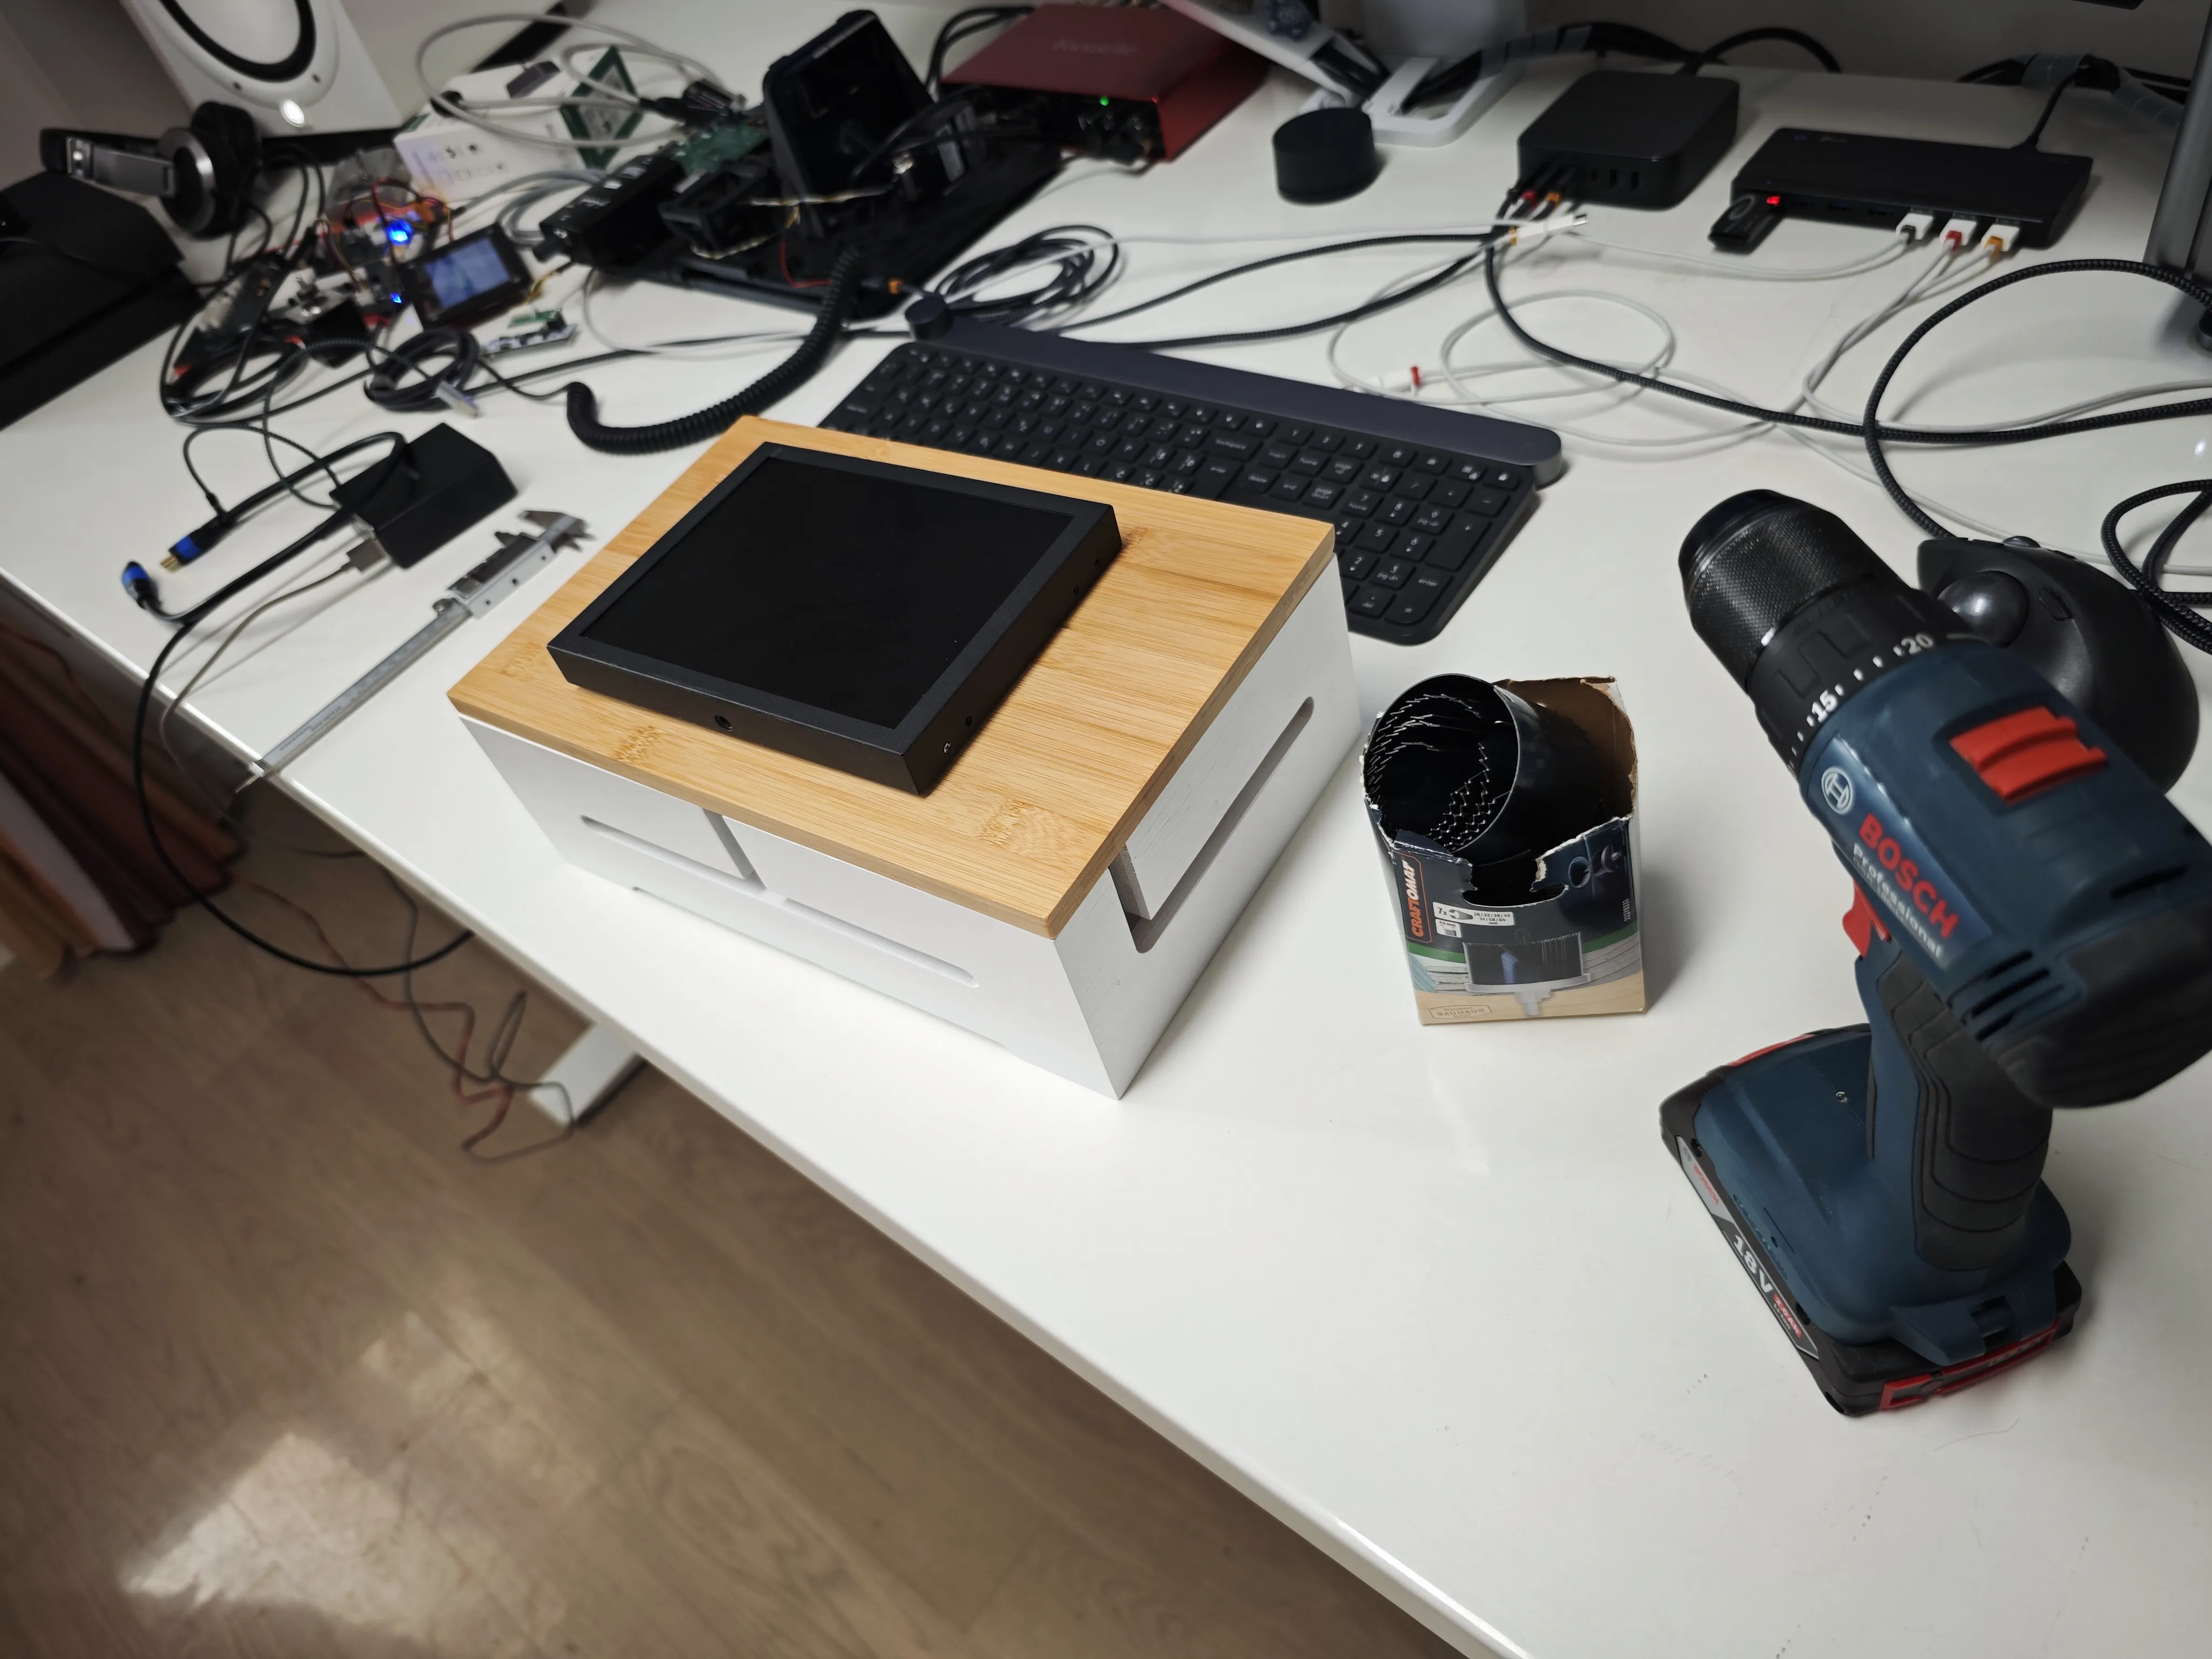
Box
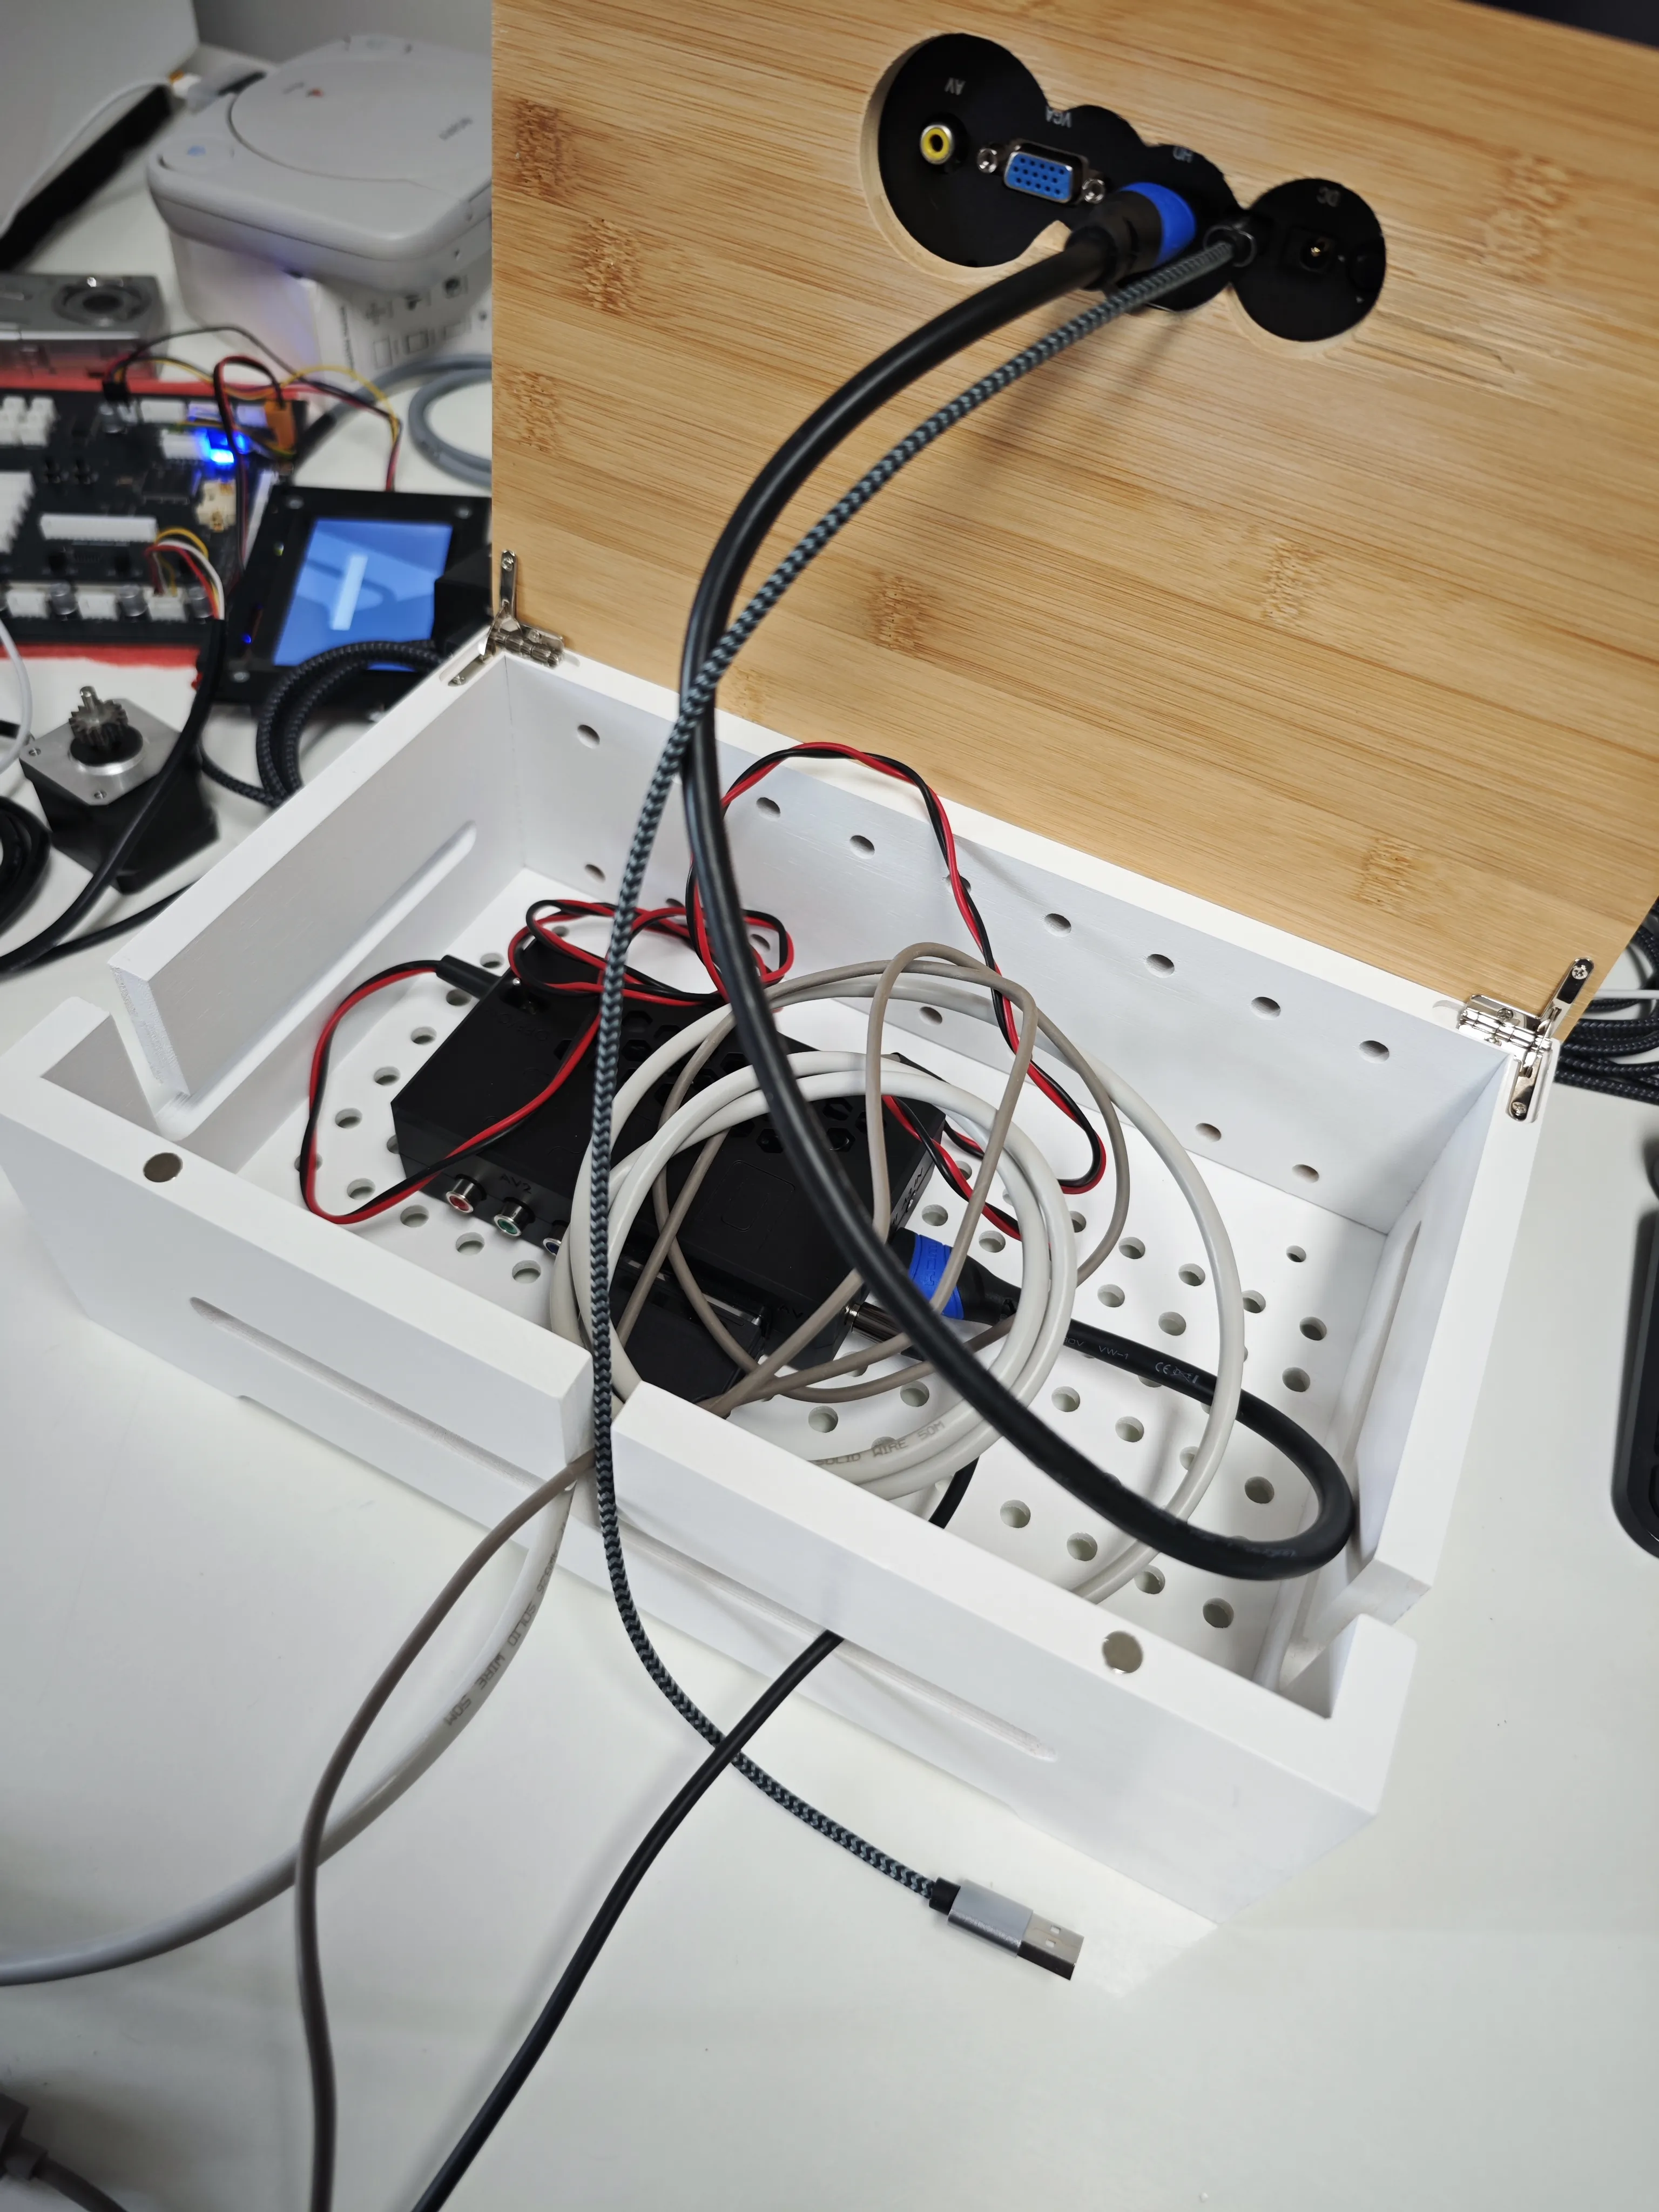
The entire setup consists of the console, the power adapter for it, the S-Video + RCA cable, the display and the power cable for the display. A bunch of stuff I needed to hide somewhere because I only wanted the console and the display to be really visible on a shelf. I found a really nice-looking cable organizer box on Amazon. The idea was: cut some holes in the top cover of it for the connectors, glue the display flush with the cover, put all the cabling inside the box and mount the box on the wall. Easier said than done, but by now I’m used to the fact that such “simple” things take the better part of the day when I want everything to be done nice and tidy, and I always do.
Preparing to drill
At this point I was still using OSSC
Audio
Since this would sit on a shelf located several meters away from my audio interface, the resulting audio wiring from the console to it would be longer than I would’ve liked for an unbalanced RCA connection, especially considering that I would need to route it right next to more than several power cables. Not the ideal situation if I wanted to avoid inducing noise into the signal. Also, after dealing with that noisy USB C power supply I was being extra careful here. Therefore, I’ve connected the PSone to a Focusrite 4i4 which is located right next to it, routed the incoming signal to a balanced output via Focusrite Control Panel, used a balanced cable to connect it to my main interface, a Focusrite 8i6, and then routed the incoming signal there to the main output. Quite a journey! But a successful one, because everything works!
Conclusion
This certainly isn’t a simple undertaking. There are a lot of things involved. If you’re looking for a simple CD player this is just obviously the wrong solution. But if you want something out of the ordinary and just plainly cool, not to mention the Y2K nostalgia factor, you’re in the right place. Is this audiophile sound? I don’t care. It plays CDs, they sound good and the entire experience is so much fun.
Final setup
Some time-appropriate music!